You are using an out of date browser. It may not display this or other websites correctly.
You should upgrade or use an alternative browser.
You should upgrade or use an alternative browser.
Replacing cooling components (genII V8)
- Thread starter SoulSoak
- Start date
joegr
Dedicated LVC Member
... I'm getting married on the 31st so I'm deffinately taking my time because my wife is a stressed out nuclear bomb and not enjoyable company right now lol...
If my wife found out I was getting married at the end of the month, I'm sure that she would be beyond upset with me.
gcwimmer
Dedicated LVC Member
If my wife found out I was getting married at the end of the month, I'm sure that she would be beyond upset with me.
:invasion:
RigsLS
Dedicated LVC Member
- Joined
- Mar 10, 2012
- Messages
- 7,734
- Reaction score
- 523
The degas is simple, but the hardest part of replacing the degas is detaching and re-attaching the lower hose (IMO). Everything else took me less than 30 mins.
^ that darnit clasp that wouldn't unsnap for me. had to get mad at it.
RigsLS
Dedicated LVC Member
- Joined
- Mar 10, 2012
- Messages
- 7,734
- Reaction score
- 523
I had to pull mine all the way back out only to discover some factory worker overdid it with the glue that holds it to the back of the line.
RigsLS
Dedicated LVC Member
- Joined
- Mar 10, 2012
- Messages
- 7,734
- Reaction score
- 523
That's the end we are talking about, mine for some reason needed a little convincing before it went back in, excessive glue had gotten onto the clasp.
joegr
Dedicated LVC Member
I see. I found that these and these helped.
http://www.harborfreight.com/16-inch-long-reach-pliers-set-38598.html
http://www.harborfreight.com/3-piece-long-reach-hose-grip-pliers-37909.html
http://www.harborfreight.com/16-inch-long-reach-pliers-set-38598.html
http://www.harborfreight.com/3-piece-long-reach-hose-grip-pliers-37909.html
RigsLS
Dedicated LVC Member
- Joined
- Mar 10, 2012
- Messages
- 7,734
- Reaction score
- 523
Yeah, I used it mostly on the DCCV and Aux pump down below on the front of the motor, I didn't see much opportunity to get that so far down back tight up against the firewall. Either way, I did eventually get it, just had to do a dry run of working the clasp loose first and then back in she went.
joegr
Dedicated LVC Member
For future reference...
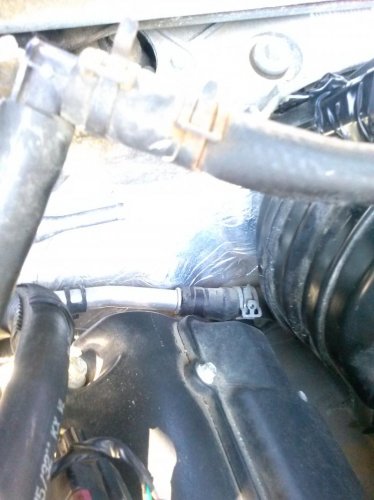
Use hose pliers to twist the hose to break it loose. If that doesn't work, very carefully use a box cutter to slice the hose open where it is connected. You have to be very careful because it is easy to cut a groove into the aluminum tube. Such a groove would probably cause the hose connection to leak.
Use hose pliers to twist the hose to break it loose. If that doesn't work, very carefully use a box cutter to slice the hose open where it is connected. You have to be very careful because it is easy to cut a groove into the aluminum tube. Such a groove would probably cause the hose connection to leak.
RigsLS
Dedicated LVC Member
- Joined
- Mar 10, 2012
- Messages
- 7,734
- Reaction score
- 523
View attachment 828461533
With some more cursing and frustration, I got it out. Doesn't appear to have visible cracks, nor' did any of my coolant plastics, so I'm hoping replacing all of this stuff still fixes my overheating problem. But if it doesn't, atleast they're all replaced.
+1 on the Degas "battle"
... actually, if you rinse it out and take it inside the house and hold it up under a light, you'll see where the stress cracks are (or signs of starting)
Mine "was" leaking/dripping towards the end but I never overheated, only lost heat, probably wasn't far off from overheating though.

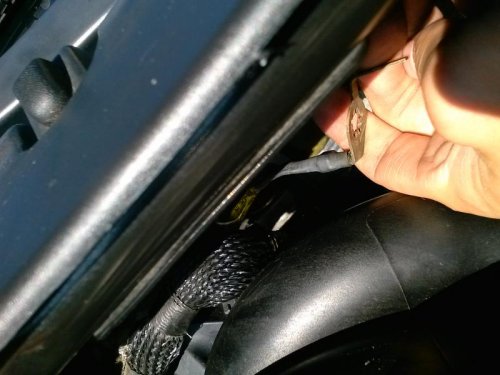
I can't remember what this wire bolts to. Its behind the intake manifold and has a yellow tag on it that says 3w4t 19a095 and says AC on it. One end of it is bolted to the metal underneath the plastic Window wiper shroud, and its about 10" to 12" long. I thought it bolted to the wiring harness junction behind the intake manifold, but can't remember if it could have bolted to the rear intake manifold long 10mm bolt or what. Urgent hell please, thablack
KyLSV8
Well-Known LVC Member
View attachment 828461563
I can't remember what this wire bolts to. Its behind the intake manifold and has a yellow tag on it that says 3w4t 19a095 and says AC on it. One end of it is bolted to the metal underneath the plastic Window wiper shroud, and its about 10" to 12" long. I thought it bolted to the wiring harness junction behind the intake manifold, but can't remember if it could have bolted to the rear intake manifold long 10mm bolt or what. Urgent hell please, thablack
I think that it does go on one of the intake manifold bolts. I can run and check im working on mine at the moment.
joegr
Dedicated LVC Member
I think that it does go on one of the intake manifold bolts. I can run and check im working on mine at the moment.
Yes, that's correct. The one at the back, driver's side. One of the long bolts that go into the engine.
This is great. I was following the bleedout procedure by removing engine fill cap, open heater air bleed, and continually fill degas bottle until coolant equalizes... Only to have the coolant gush out of my engine fill ALL OVER MY BRAND NEW SERPENTINE BELT. Awesome.
Telco
Dedicated LVC Member
For future reference...
Use hose pliers to twist the hose to break it loose. If that doesn't work, very carefully use a box cutter to slice the hose open where it is connected. You have to be very careful because it is easy to cut a groove into the aluminum tube. Such a groove would probably cause the hose connection to leak.
I actually cut a groove in the heater core tube's aluminum lip on my Silverado, but it doesn't leak as there was enough tube between the groove and the firewall that a screw clamp was able to seal it off. As Joe said, it's very easy to notch aluminum with a razor blade. I knew it was possible, knew where the lip was and was being careful and STILL sliced through the aluminum lip! It's better to make multiple very light passes on the hose trying to cut part of a layer at a time than to try and cut it in one go.
joegr
Dedicated LVC Member
This is great. I was following the bleedout procedure by removing engine fill cap, open heater air bleed, and continually fill degas bottle until coolant equalizes... Only to have the coolant gush out of my engine fill ALL OVER MY BRAND NEW SERPENTINE BELT. Awesome.
The procedure says to install and tighten the engine fill cap just as soon as coolant starts to come out of it!
Just wash the coolant off the belt and it will be okay. It's only a problem if you leave the coolant on the belt for too long.


