My 2005 Lincoln LS 3.0 thread

MysticMac

Well-Known LVC Member
Joined
Aug 18, 2015
Messages
410
Reaction score
42
Location
Vancouver British Columbia
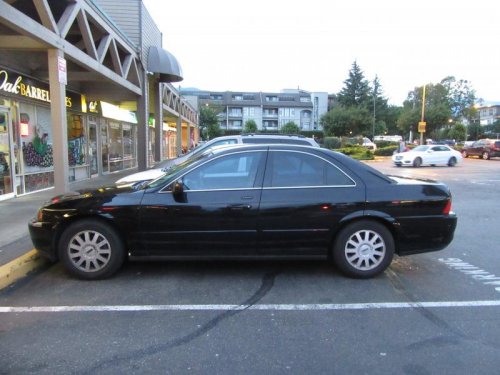
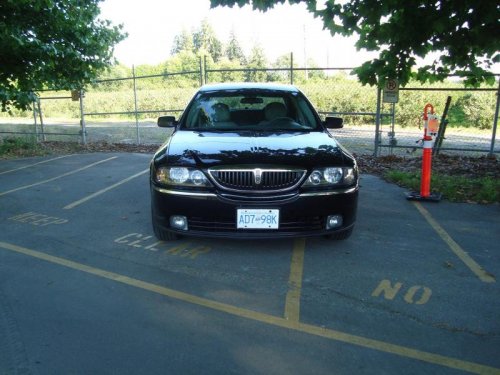
Long time lurker on here and have owned a 05 LS for about a year and a half now. Purchased it with about 170,000 km's off for $2,900 canadian dollars... Heres a picture of it the day I bought it.
IMG_0432.jpg

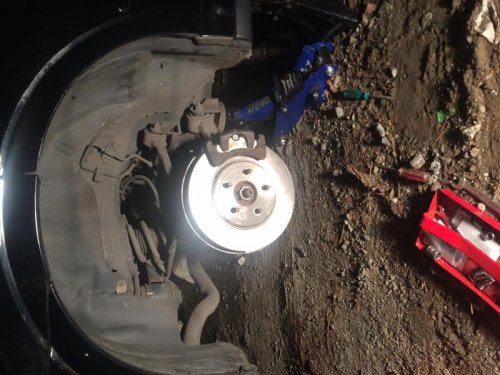
First on the list was the brakes. I did them at night in my back alley.
IMG_0757.jpg

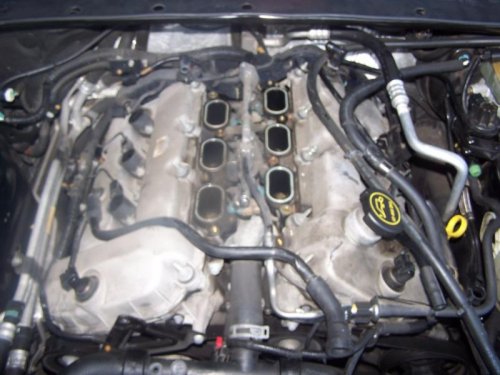
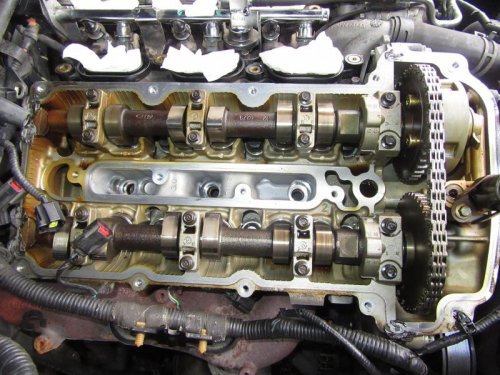
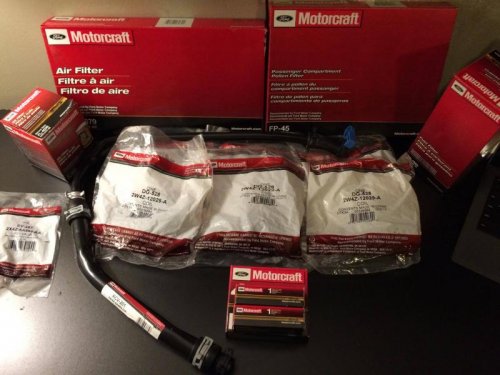
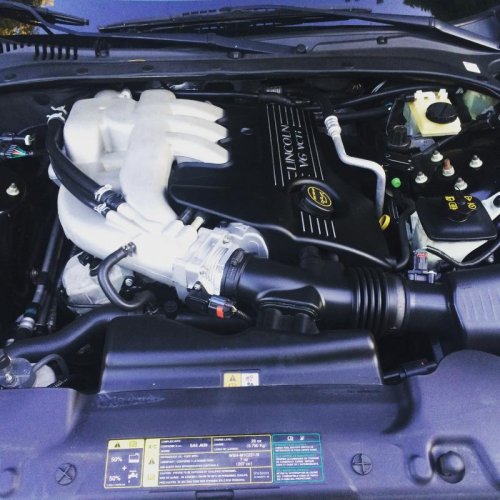
Not too long after I did the brakes I noticed some misfires so I went and purchased 6 new coils,plugs,valve cover gaskets(felpro),pcv, air filter,fuel filter,cabin air filter, all Motorcraft of course. This was going to be the first time doing any major work on my LS. Poor design makes the coil and plug job a bit harder than the v8. I needed to remove the intake to get at the passenger side coil bank.
13036366_10156807704900402_1512120442_o.jpg
13.jpgIMG_0331.jpg

Got it all back together with in a couple days. It wasnt nearly as hard as I thought it would be. Heres a shot of everything back together and after I washed the engine and cleaned it up.
IMG_0505.jpg

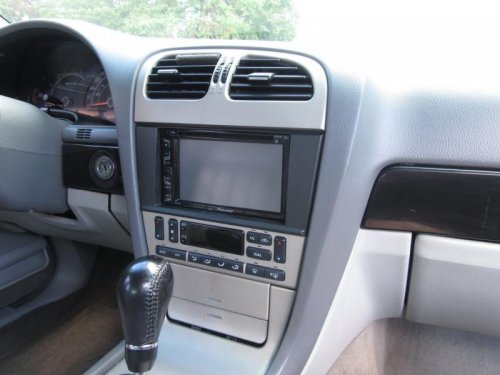
After doing all that work the car felt great to drive so I rewarded my self with a double din dvd player
13737558_10157155198000402_6813130061810723196_o.jpg
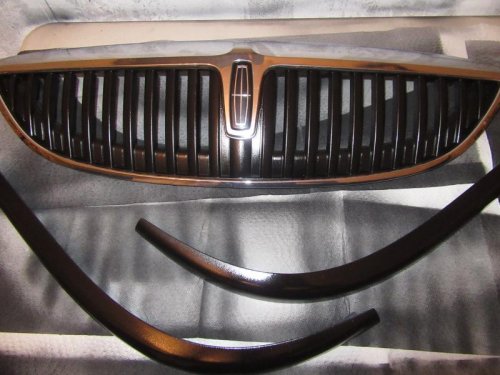
I wanted to somewhat "colormatch" my grill and chrome trim on the bumpers. Turned out great.
IMG_0463.jpg


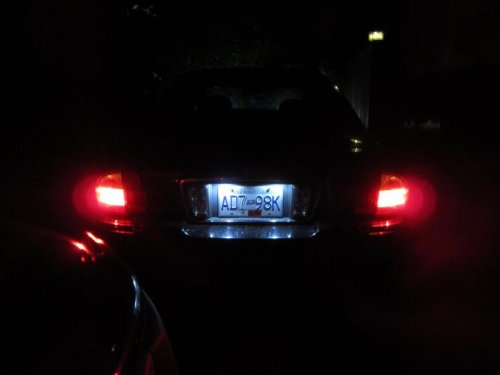
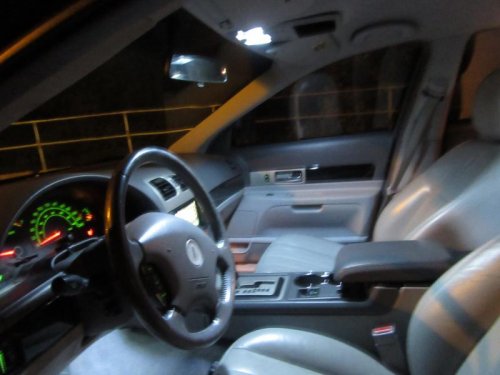
I ordered some LEDs from ebay and swapped out the interior lights and license plate lights as well. They look amazing.
IMG_0630.jpg
13724903_10157208208985402_3675281653704990242_o.jpg

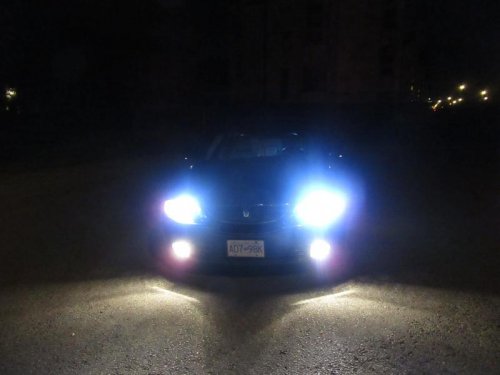
I ordered some HIDs off ebay until I get some nice stock HIDs.
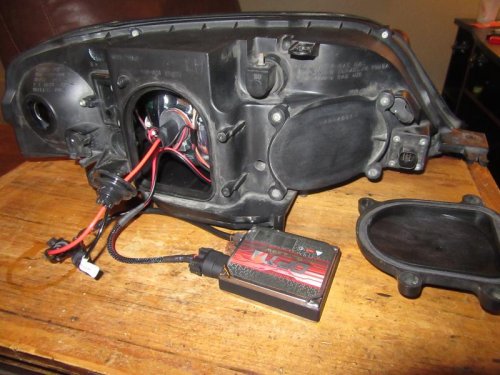
IMG_0279.jpg
IMG_0619.jpg

All the tint was failing so I removed it. Heres a video of the comparison of tint/no tint. I will be re tinting agan.
[video=youtube;3s956wgZx9U]https://www.youtube.com/watch?v=3s956wgZx9U&feature=youtu.be[/video]

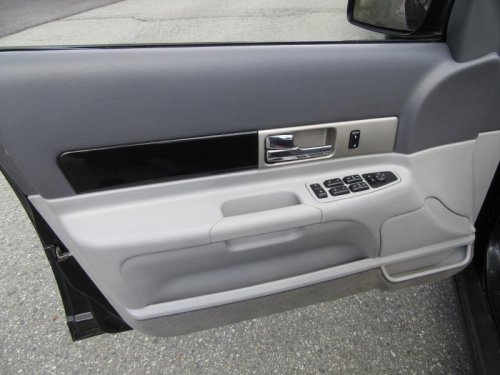
I steamed and super cleaned my interior. Looks like a completely different color now.
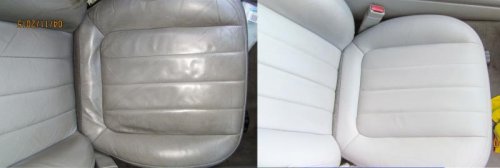
13838163_10157097650800468_1558528499_o.jpg
13708324_10157155197365402_4736126625273948801_o.jpg

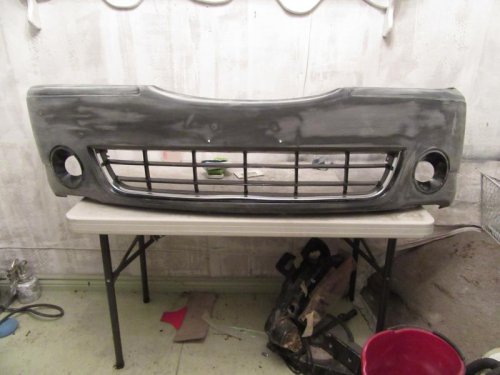
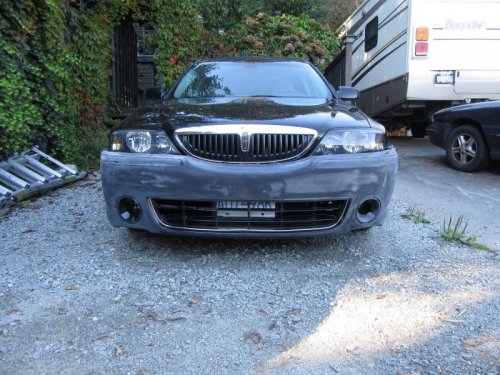
I prefer the LSE/06 bumper over the one i have so when one came up for sale I bought it with minor damage. Still need to prime and paint/gloss.
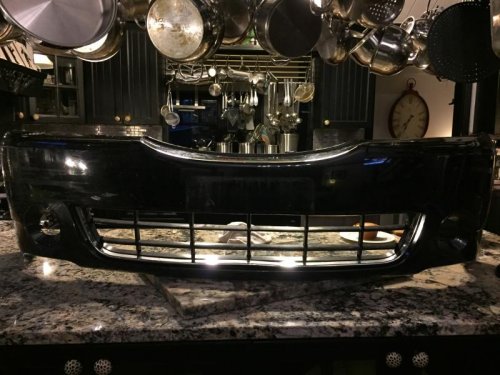
IMG_1864.jpg14438761_10157467608120402_1061551511_o.jpg

Heres me pretending to have a 06

14393382_10157475705345402_1345944426_o.jpg

This brings me to about a week and a half ago when I came across these 19 inch Jaguar Performance Wheels off craigslist.
Paid $300 canadian for them. Waiting for the snow to go away before I throw them on. REALLY happy wth these.
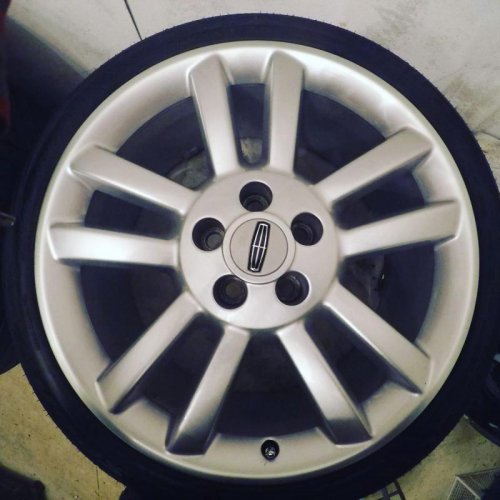
0479CDFB-C8D4-4878-9519-6B80C5056C0F.jpg
[video=youtube;RUTpNedwa0E]https://www.youtube.com/watch?v=RUTpNedwa0E[/video]

Couple of shots of my car
13734992_10157063171425468_9086980132772007138_o.jpg


Need to do list :

Install new window regulator assembly
Install new DCCV
fix leaky wiper cowl gaskets
Fix tiny paint chip on drivers side fender
Re tint
Install my sub and amp

IMG_0432.jpg


13.jpg


IMG_0331.jpg


IMG_0505.jpg


13737558_10157155198000402_6813130061810723196_o.jpg


IMG_0630.jpg


13724903_10157208208985402_3675281653704990242_o.jpg


IMG_1864.jpg


14438761_10157467608120402_1061551511_o.jpg


14393382_10157475705345402_1345944426_o.jpg


0479CDFB-C8D4-4878-9519-6B80C5056C0F.jpg


13036366_10156807704900402_1512120442_o.jpg


IMG_0757.jpg


13838163_10157097650800468_1558528499_o.jpg


13708324_10157155197365402_4736126625273948801_o.jpg


IMG_0279.jpg


IMG_0619.jpg


IMG_0463.jpg


13734992_10157063171425468_9086980132772007138_o.jpg
 
Great progress Mac, wheels will look good on it, black that entire LS out. Everything black. +1
 
Why do you call the intake a poor design? Where else are the dual-intake runners supposed to go? To get the proper length there would need to be a bulge in the hood. The V6 is based on the V6 used in the Taurus/Sable since 1996. The runners have been "over" one bank of Ford's V6's since at least 1986; I'm not sure of how any other manufacturer does it.
 
its a poor design because you need to remove the intake off the car to get at the 3 coils... i dont care how long its been lkle that. its a terrible design and one reason why eventually I will be buying a 06 and putting everything from this car on it.
 
its a poor design because you need to remove the intake off the car to get at the 3 coils... i dont care how long its been lkle that. its a terrible design and one reason why eventually I will be buying a 06 and putting everything from this car on it.

Just curious, how would you have done it better (on this V6, with the runner control, and such that it fits the LS and the FWD cars it goes in)?
 
im not a engineer. Just sick of removing the intake everytime.. one of the main reasons i will be getting a 06. Im sure its the best design they could come up with but being the owner of 3.0 and being the one working on my car I think its a ****ty design.
 
im not a engineer. Just sick of removing the intake everytime.. one of the main reasons i will be getting a 06. Im sure its the best design they could come up with but being the owner of 3.0 and being the one working on my car I think its a ****ty design.

Again... In order to contain the UNEQUAL LENGTH RUNNERS you would need a bulge in the hood to contain the vertical runners. You would then probably not be able to see over the bulge.
 
I dont want this to turn into an argument lol. I have a feeling I would prefer changing coils on the 3.9 over the 3.0. I have to remove the intake again once the snow goes away. Have a leaky wiper cowl gasket and its leaking water on my coils. Its not that hard but it's just a pain to get at the plugs and coils.
 
... Have a leaky wiper cowl gasket and its leaking water on my coils ...

Mac, just a note on this matter. I have the same issue now with my wife's 03 LS V8.

The foam gasket not touching and properly sealing off at the passenger wiper arm, it is causing windshield washer fluid to leak down directly onto the center of the engine appearance cover.

What I also took notice of is that if one has had the entire cowl removed, when reinstalling it, you have to make certain it seams up properly at the glass side.
The entire rubber seal on the plastic cowl has to be properly aligned and "pushed" in along the bottom of the glass. It has to zip up similar like a closing zip lock bag. It actually clicks in underneath the glass at the very bottom.

It was getting super minus stupid cold out the other night I was doing this washer repair and VCT seals replacement.
I had to give up once I realize this issue as I was putting it back together.

I have to redo it once it warms up a bit next few days.

I was having trouble getting the entire run of the glass portion seal to sit flush. exactly and specifically at the bit directly above the passenger side wiper arm.
I could not get the seam at the glass to push down and seam tight to the glass at that portion. Something underneath was preventing it from wanting to sit flush.
This left a small gap that rain water or sprayed washer fluid, would run down the glass and get in behind the seam, leaking down further.

Taking note that the old foam seal isn't aligning correctly.

I'm going to get it off again and get it into the house (warmed up), clean it up, install the new replacement gasket and try again.

The foam gasket has to sit flush and evenly aligned, only then will the glass side bead seam snap in at the bottom of the glass.

The ends of the plastic cowls should be focused on last. The foam around the wiper arm should be aligned first.

The entire rubber seal at the bottom of the glass has to be seamed up by pushing it down and snap it around the bottom of the glass edge. It actually has a hard cornered lip on the rubber seam. Pushing down from the center towards the ends will make it zip up to the glass. Put from the center at the wiper arm area, towards the outsides.

If this glass side seam is not flush, it will not sit right and potentially cause a lifted bulged area from rubber seam to glass and will leak further.


I'll be taking a couple more pics when I get to redoing this.


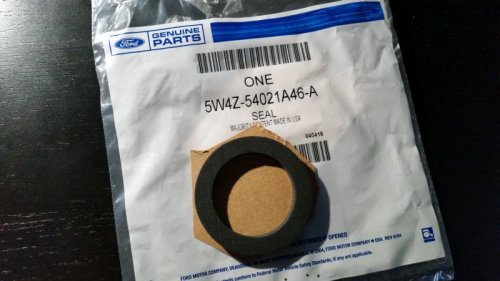
This is the foam replacement gasket for the passenger wiper arm. There is only the one needed on the plastic cowl.

seal.jpg


The rubber seam is on the plastic cowl on the underneath bottom side. (not pictured)

It was only a bit of an ordeal because the extreme cold temperatures was getting to me.

Too cold and bothered, will redo another night, kinda thing :mad:

seal.jpg
 
There are tabs on the cowl that have to fit correctly into slots under the windshield. It sounds like you have one that missed the slot. The last time I has a windshield replaced, they did this. The result was a very strange noise when going over 60 MPH. I took it back twice, and they reglued the top and sides of the windshield. After the 2nd failed try, I looked closer at it and saw what they kept missing. It was easy to correct then.
 
Yup. have to revisit. I blame defeat on getting fed up from working with numb fingers. Simply got too cold, went inside instead.
 
Looks great!! I really like the look of the interior, might try that for myself... But, what harness did you use for that pioneer radio and did it give you any trouble?
 
First time taking a peep at my car since the snow fall. Perfect oppurtunity to throw on my new car cover. [video=youtube;oY2HKy9asZY]https://www.youtube.com/watch?v=oY2HKy9asZY&t=685s[/video]
 

Members online

Back
Top