So I did a cooling system overhaul on my 2003 Lincoln LS8 this August of 2013. I couldn't have done it and wouldn't have even attempted it without the excessive help of this forums great community. I have been very strapped for time due to my wife and step son, as well as my occupational slavery. But as promised in my previous thread, here is an in depth thread on your cooling system replacement for your 2nd Generation Lincoln Luxury Sport 3.9L V8. I'm no professional at making nice threads, but I'll do my best to make this clean.
Let's start with a parts list. This list will contain the part numbers as well as the PNC's from Ford.
(Part Number) (PNC)
* "8548A" / "4Z-8548-AD" (Main Plastic Body)
* "9N499" / "9Z-9N499-AC" (Plastic Elbow behind Main Plastic Body)
* "8592" / "4Z-8592-AA" (Plastic Facet that attaches to Main Plastic Body, it houses the Thermostat Assy)
The 3 parts listed above are the dreaded cooling plastics that tend to get stress cracks and leak and/or allow air to enter your cooling system. This allows your coolant to boil, which results in your vehicle overheating.
(Part Number) (PNC)
* "HR1" / "707299-S300" (*top* O-ring for the 9N499 to 8548A)
* "8255B" / "4Z-8255-CA" (*bottom* O-ring for the 9N499 to engine block)
* "8255A" / "JV-8255-CB" (The 2 O-rings from 8548A to front face of engine block)
* "8590" / "9Z-8590-AB" (Large O-ring from 8548A to 8592)
* "9439" / "9Z-9439-AA" (Intake Manifold Gasket)
The 4 parts listed above are the various O-rings (gaskets/seals) that are contained within/between the 3 cooling plastic components (8548A, 94N99, and 8592). The 5th part on the list is the Intake Manifold Gaskets. If you're going through the trouble to replace all of your cooling system plastics.. you should replace your Intake Manifold Gaskets as well since they are cheap and you will have the Intake Manifold off since it's highly recommended to remove it to install the "9N499" cooling plastic elbow. There's a way around removing your Intake Manifold, but it's just as much work to wrench around it rather than take it off.
(Part Number) (PNC)
* "8A080" / "5W4Z-8A080-AA" (Radiator Overflow Assy, aka "Degas Tank")
* "8575" / "9Z-8575-AB" (Thermostat Assy)
* "8548B" / "4Z-9F814-AA" (Rubber Hose from Block to 8548A)
* "8260" / "4Z-8260-BB" (Upper Radiator Hose)
* "8286A" / "4Z-8286-CB" (Lower Radiator Hose)
The 5 parts listed above are the Degas Tank, Thermostat Assy, Rubber Hose that runs underneath Intake Manifold, and the Upper/Lower Radiator Hoses. I personally didn't replace my Upper and Lower Radiator Hoses because I inspected them and they looked good. Now looks can be deceiving and I highly recommend replacing them. I simply didn't do it because I have a friend that is going to fabricate some for me. The radiator hoses contain plastic in relativity of your other plastic cooling components which will stress crack as well.
Alright, now that all the main/necessary parts have been listed.. I can provide some images and advice. This won't be a complete guide or step by step process, but it should assist you in battle.
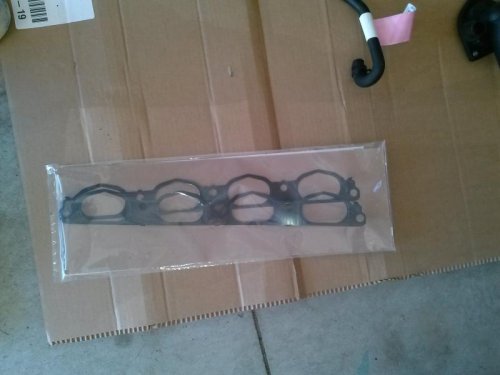
Intake Manifold Gaskets (9439)
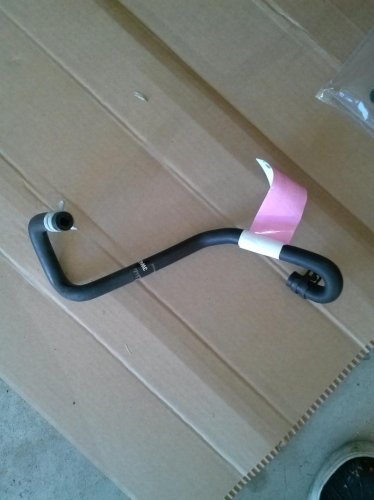
Hose that runs underneath Intake Manifold (8548B)
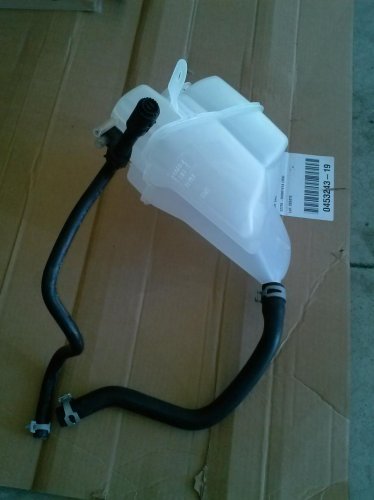
Degas Tank (8A080)
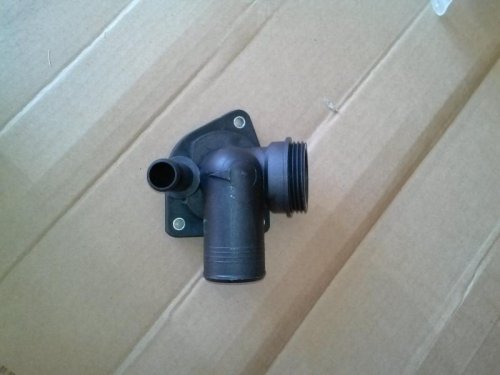
Thermostat Housing (8592)
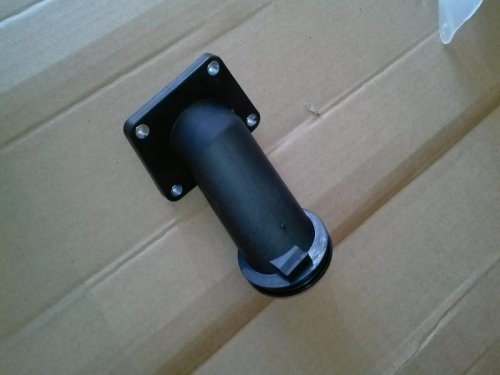
Plastic Elbow that's underneath Intake Manifold (9N499)
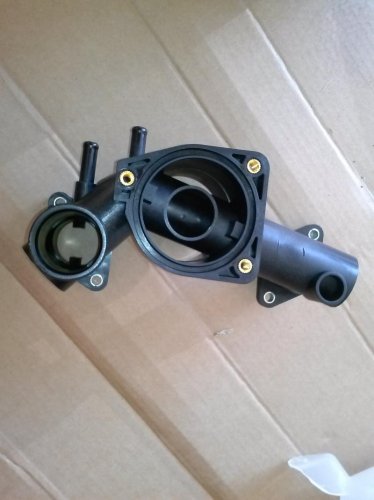
Main Plastic Body (8548A)
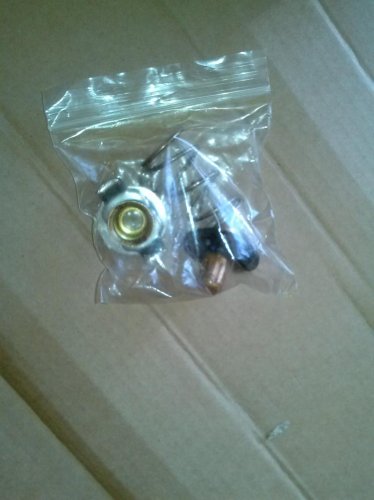
Thermostat Assy (8575)
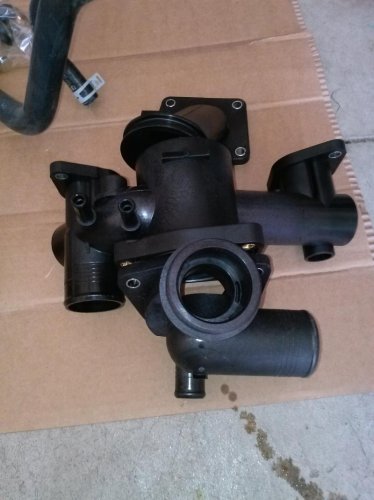
8548A, 9N499, and 8592 assembled together.
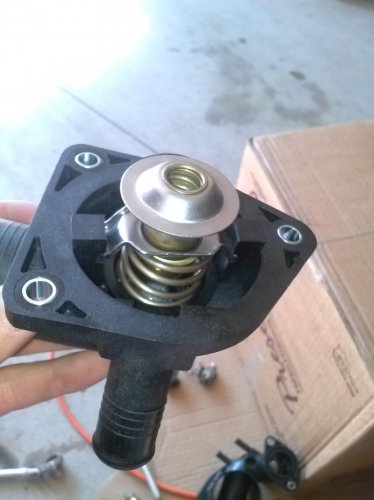
Thermostat Assy (8575) correctly installed into Thermostat Housing (8592)
Alright guys, unfortunately my wife just showed up and I already got the look. I'm making this thread at my mothers house by the way because we don't have a computer at the house. So I have to get going. Unfortunately this thread is going to be a parts list for the time being, until I get some more time to finish it. I have several other photos that are great for preventative damage throughout this installation process. Sorry I couldn't finish it. God Bless you all and your LS's.


Let's start with a parts list. This list will contain the part numbers as well as the PNC's from Ford.
(Part Number) (PNC)
* "8548A" / "4Z-8548-AD" (Main Plastic Body)
* "9N499" / "9Z-9N499-AC" (Plastic Elbow behind Main Plastic Body)
* "8592" / "4Z-8592-AA" (Plastic Facet that attaches to Main Plastic Body, it houses the Thermostat Assy)
The 3 parts listed above are the dreaded cooling plastics that tend to get stress cracks and leak and/or allow air to enter your cooling system. This allows your coolant to boil, which results in your vehicle overheating.
(Part Number) (PNC)
* "HR1" / "707299-S300" (*top* O-ring for the 9N499 to 8548A)
* "8255B" / "4Z-8255-CA" (*bottom* O-ring for the 9N499 to engine block)
* "8255A" / "JV-8255-CB" (The 2 O-rings from 8548A to front face of engine block)
* "8590" / "9Z-8590-AB" (Large O-ring from 8548A to 8592)
* "9439" / "9Z-9439-AA" (Intake Manifold Gasket)
The 4 parts listed above are the various O-rings (gaskets/seals) that are contained within/between the 3 cooling plastic components (8548A, 94N99, and 8592). The 5th part on the list is the Intake Manifold Gaskets. If you're going through the trouble to replace all of your cooling system plastics.. you should replace your Intake Manifold Gaskets as well since they are cheap and you will have the Intake Manifold off since it's highly recommended to remove it to install the "9N499" cooling plastic elbow. There's a way around removing your Intake Manifold, but it's just as much work to wrench around it rather than take it off.
(Part Number) (PNC)
* "8A080" / "5W4Z-8A080-AA" (Radiator Overflow Assy, aka "Degas Tank")
* "8575" / "9Z-8575-AB" (Thermostat Assy)
* "8548B" / "4Z-9F814-AA" (Rubber Hose from Block to 8548A)
* "8260" / "4Z-8260-BB" (Upper Radiator Hose)
* "8286A" / "4Z-8286-CB" (Lower Radiator Hose)
The 5 parts listed above are the Degas Tank, Thermostat Assy, Rubber Hose that runs underneath Intake Manifold, and the Upper/Lower Radiator Hoses. I personally didn't replace my Upper and Lower Radiator Hoses because I inspected them and they looked good. Now looks can be deceiving and I highly recommend replacing them. I simply didn't do it because I have a friend that is going to fabricate some for me. The radiator hoses contain plastic in relativity of your other plastic cooling components which will stress crack as well.
Alright, now that all the main/necessary parts have been listed.. I can provide some images and advice. This won't be a complete guide or step by step process, but it should assist you in battle.

Intake Manifold Gaskets (9439)

Hose that runs underneath Intake Manifold (8548B)

Degas Tank (8A080)

Thermostat Housing (8592)

Plastic Elbow that's underneath Intake Manifold (9N499)

Main Plastic Body (8548A)

Thermostat Assy (8575)

8548A, 9N499, and 8592 assembled together.

Thermostat Assy (8575) correctly installed into Thermostat Housing (8592)
Alright guys, unfortunately my wife just showed up and I already got the look. I'm making this thread at my mothers house by the way because we don't have a computer at the house. So I have to get going. Unfortunately this thread is going to be a parts list for the time being, until I get some more time to finish it. I have several other photos that are great for preventative damage throughout this installation process. Sorry I couldn't finish it. God Bless you all and your LS's.


