What Do You Use To Seal Headlights?

jbelcourt

Dedicated LVC Member
Joined
Nov 1, 2013
Messages
572
Reaction score
23
Location
Orlando
I hope this wasn't posted already but I did an advanced search and found nothing on what you can use to seal them.

I noticed after I cleaned my headlights that the driver side had a little bit of tiny rust particles on the bottom inside but didn't think much of it. Today, it was raining and I noticed after driving the car there was slight condensation inside that same headlight assembly. Tomorrow I want to pull both my headlights and my corner taillights out and seal them to make sure moisture doesn't get in. I assume I just need to seal the whole outer edge where they would "connect" from the back side.

What do you guys recommend? I was thinking some spray on sealant like Rustoleum sells, but I'm not positive. Figured I'd ask first before I go spraying stuff on the backside of them.

Thanks for any advice.
 
Silicone sealant should work, spread it around on the seams with a popsicle stick.
 
About to go grab some silicone.

Should I pull them and bake them in the oven or anything to ensure there's no moisture inside? If so, what temp and how long? Or do you think they're fine to just seal..
 
I would leave the oven alone because bad things can happen, much worse than a little moisture. Just use a blow dryer to blow on the tops and bottoms of the housings and just heat them up enough to make any condensation evaporate. Then seal them.
 
I would leave the oven alone because bad things can happen, much worse than a little moisture. Just use a blow dryer to blow on the tops and bottoms of the housings and just heat them up enough to make any condensation evaporate. Then seal them.

Awesome, thanks man. Just got back from the store. I'll go downstairs in a few and start pulling the assemblies out and I'll blow dry them. I had read online about "cooking" them and thought it was a horrible idea but it seemed a lot of people were doing it lol.
 
OK, I cannot figure out how to remove the headlight assembly. Been taking trim and stuff off for the last 45 minutes and can't figure it out.

Is there a tutorial anywhere?
 
3 metal clips on the back of each housing and don't lose none of them or break any or you'll never get them aimed right until the missing one is replaced. Putting them on is easier then removing them. That's my experience anyway. I use real long slightly curved needle nose to get the clips off. Screwdriver too for side prying.
 
There are 3 clips that have to be removed in the back. They have them locked on. Be careful removing them because they will fly 30 feet before you know it.

Yeah I'm an idiot. I had like all the chrome trim off the front and the radiator cover and everything and couldn't figure it out. Came in, posted, got water, walked back down and noticed the clips lol. One of them did go flying, surprised me when it popped off.

About to start cleaning them up and putting the silicone on now.
 
Be sure to go back down straight with each clip and get it in all the way. If they're out any, they will work loose when you try aiming them or with much vibration and then you'll be looking for more.
 
Be sure to go back down straight with each clip and get it in all the way. If they're out any, they will work loose when you try aiming them or with much vibration and then you'll be looking for more.

I was going to ask you actually, what's the best way to aim them? Just taking them out shouldn't screw the adjustment up right?

Got the silicone one now, waiting for it to set. Going to blow dry them after they dry then put the bulbs back in and go reinstall them.
 
Sometimes the aim can get off when they're removed but you'll just have to test them and see. Mine have 4 HID 6000K bulbs and usually have to be aimed again if they're pulled out for any reason.
HeadlightsAimed001.jpg


I was aiming them here in this pic.

HeadlightsAimed003.jpg
 
Ah, gotcha. I'll have to check them out after I put them in.

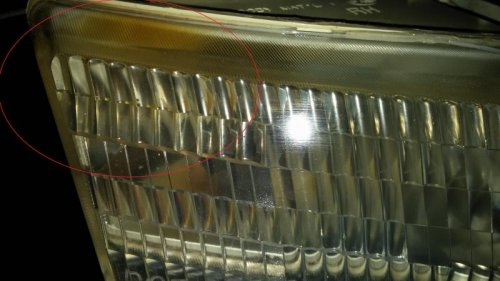
So mad at myself. I was blow drying and I think I held it in one spot for just a few seconds too long. Passenger side now has a slight yellowish burnt look to one corner and I'm almost positive it wasn't there before. I think I burnt the inside chrome when I was doing it.

It's normal for a lot of older housings to have yellowing on the backside grey area. I doubt you done it with the blow dryer but I guess it's possible.

seems unlikely, but yeah maybe.
let me dig out my really bad housings...
 
nissan actually recommeneded that I put my frontier head lights in oven when I had moisture. They said 150-180--lowest setting on oven, put in with no bulbs, and leave in for 20 min Then let it cool normally.

This re heats the butyl rubber seal and seals it.

You can also buy the butyl rubber--it comes in a strip. I had bought some when I sent my head light in to get re-vacuum metalized (new reflector). I dont recall where--but you can buy the stuff. Its much nicer than silicone which makes a huge mess and wont hold up. If it would, the factory would use silicone to seal the hl.

I'm only repeating what I was told=== dont shoot the messenger.
 
Here is what I'm talking about on mine...

CAM00140.jpg

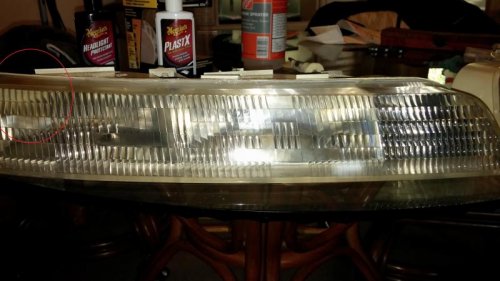
I circled the little area. I could be wrong but I could have sworn that wasn't there before I pulled out the blow dryer. On the driver side, I use it for a fraction of the time just to be safe. While I had them out, I decided to buff them again with PlastX and apply the headlight protection. Flash went off on all the pictures and it seems like they still have good reflective material in them so that's good.

Anyway, I applied a generous consistent bead of silicone around the entire seam and then spread it thin with a popsical stick and cleaned up what spread all over the upper plastic portion so it looked clean. Went around the entire thing and looked for any possible points of moisture entrance like around the stock bracket seals on the bottom and put a little silicone on them too. All and all, seemed to come out pretty nicely. Going to do the tail light assemblies next weekend. Ran out of daylight.

CAM00142.jpgCAM00141.jpg

CAM00140.jpg


CAM00141.jpg


CAM00142.jpg
 
2013-11-17 17.46.31.jpg

you didnt do that. that's long term exposure to the headlight heat and uv rays. mine old set has the same brown spots.

2013-11-17 17.46.31.jpg
 
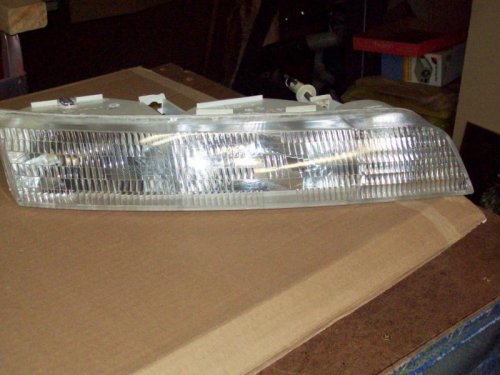
GEN 1 HDLT 2.jpgWhat Chris said about heat. You didn't do it with hair dryer. I tried mounting a heat sink right above the base of low beam bulb. (chrome piece on top of housing) Hooked up on bench heat got to 154 degrees at the heat sink which is about 1/4" above base of the bulb, in 15 min. The lense got pretty hot also. A little wind from a muffin fan cooled everything down quickly. If the car isn't moving the lights will get very hot.

GEN 1 HDLT 2.jpg
 

Members online

Back
Top