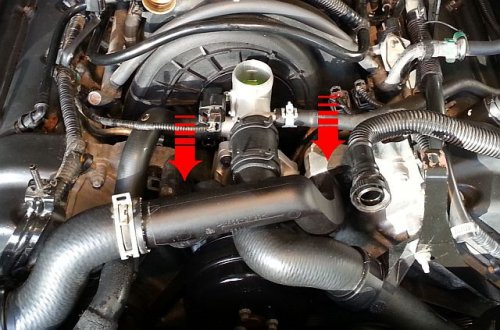
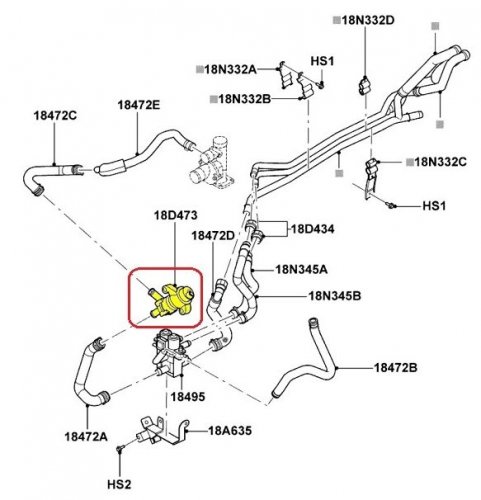
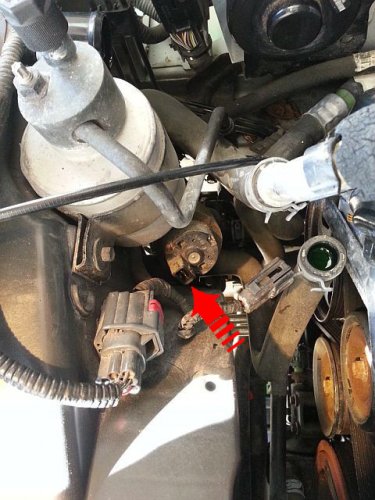
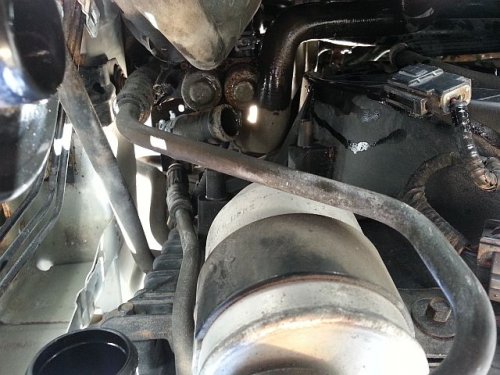
Dccv?

I bought some off brand and it died in 7 months.

yeah, the OEM YG-355 is the way to go, I got mine for 143$ all in, free shipping.

- - - - EDIT:

Well ... after a day of aches and pains, scrapes down the inside of my right arm from the fan shroud assembly
... she's all back together again.
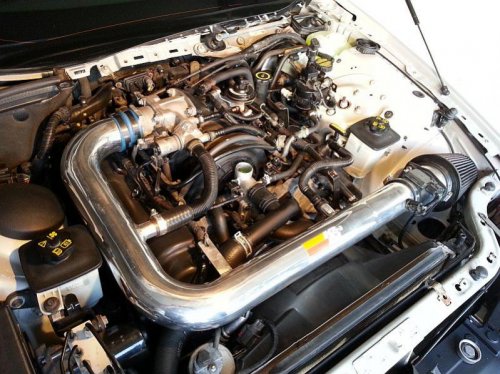
20130330_182542.jpg

Had to borrow a couple tools from some professionals but I got it done with the help of this LVC site and my GEN I workshop manual.

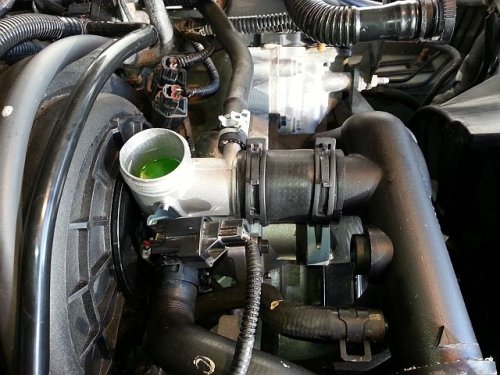
All bled and air out, ran it long enough for the thermostat to open and circulate the colder coolant from the lower rad hose to radiator through.

Lots of heat from the console on both sides, more heat than ever before.
Engine Temperature stays nicely at the middle of the gauge, no overheating.


Work completed:

Re&Re -

1) OEM Degas Bottle, (p/n 5W4Z-8A080-AA)
2) Jag Aluminum Thermostat housing,
3) OEM Thermostat,
4) OEM Coolant Outlet Pipe,
5) OEM Auxiliary Coolant Flow Pump, (p/n 1W4Z-18D473-AA)
6) OEM Dual Coolant Flow Valve (DCCV)


The DCCV was a major pain in the @ss!!! not going to lie, it sucked big time!!!
getting the hoses and clamps off and back on in such a tight place tested my patience to the max.

Got a bit more to clean up and bolt on the rest of the cosmetics today.

Degreasing and painting a few parts. Also need to purchase a new Silicone sleeve for the intake near the TB, blue being replaced with black and thicker material and need a new worm clamp for the MAF side of the intake as it's stripped and won't tighten down properly.

Very rewarding for a DIY'er ... I learned as much as I cussed.

20130330_182542.jpg
 
Re&Re Degas Bottle

Removal and Installation

1) Drain the engine cooling system.

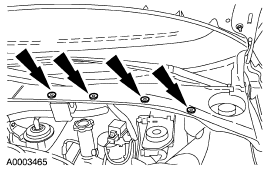
2) Remove both wiper blade arms and the cowl vent screen.
s1x~us~en~file=a0003465.gif~gen~ref.gif

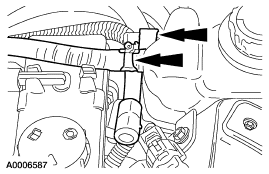
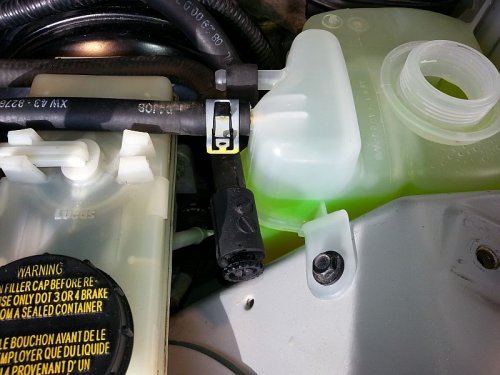
3) Disconnect the engine vent hose, and separate the air bleed hose from the degas bottle.
s1x~us~en~file=a0006587.gif~gen~ref.gif

degas1.jpg

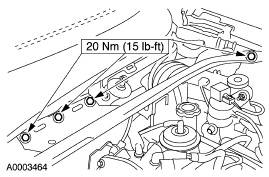
4) Remove the seven bolts and reposition the cross vehicle support.
s1x~us~en~file=a0003464.gif~gen~ref.gif

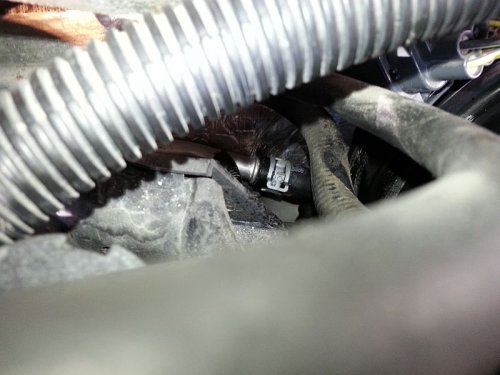
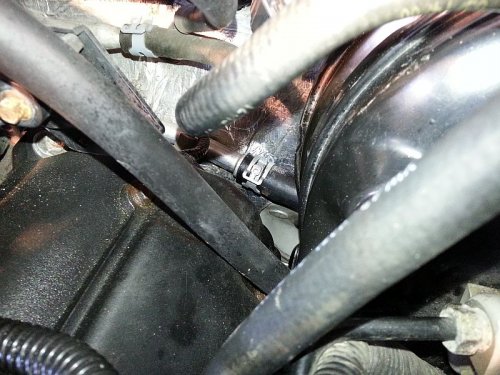
5) Disconnect the degas return hose from the degas return tube.
s1x~us~en~file=a0003489.gif~gen~ref.gif

* down along the firewall just past the Brake Booster housing.
degas2.jpg

* you can move a few things out of the way to provide easier access.
degas3.jpg

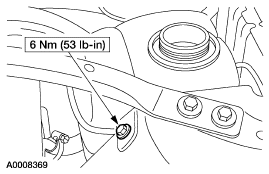
6) Remove the two bolts. (that hold the Degas Bottle in place)
s1x~us~en~file=a0008369.gif~gen~ref.gif

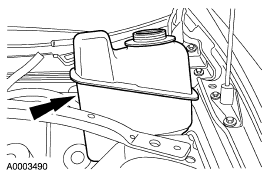
7) Remove the degas bottle from the vehicle.
s1x~us~en~file=a0003490.gif~gen~ref.gif

8) To install, reverse the removal procedure.


When the new bottle goes in, your going to find that feeding the lower hose (already attached to the new bottle),
underneath the Brake Booster, is prone to want to go underneath the Steering Shaft Knuckle (at the firewall) due to the angle.

brakebooster.jpg


I used a long stick about 3 feet in length guided down from near the front of the Coil cover,
pointing towards to the Intermediate Steering Shaft Knuckle at the firewall ...

steering.jpg

... helped in pushing the lower hose upwards overtop of the Steering Knuckle.


~ Apply a little vaseline around the tip of the aluminum degas return line to aid in getting the new hose on.

~ The return hose will need a little convincing with a long screw driver to coach it onto the Aluminum return line.

~ The clamp on the return tube of the new degas bottle is provided in the open position and getting it to unsnap is a bit tricky

degas1.jpg


degas2.jpg


degas3.jpg


brakebooster.jpg


steering.jpg


s1x~us~en~file=a0003465.gif~gen~ref.gif


s1x~us~en~file=a0006587.gif~gen~ref.gif


s1x~us~en~file=a0003464.gif~gen~ref.gif


s1x~us~en~file=a0003489.gif~gen~ref.gif


s1x~us~en~file=a0008369.gif~gen~ref.gif


s1x~us~en~file=a0003490.gif~gen~ref.gif
 
Re&Re Jag Aluminum Upgraded Thermostat housing

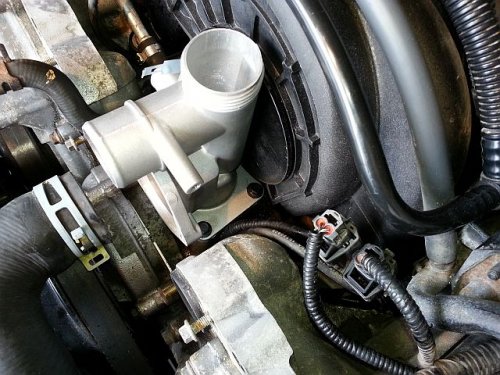
On the Thermostat housing, you're going to find ....

jag1.jpg
jag2.jpg
jag3.jpg

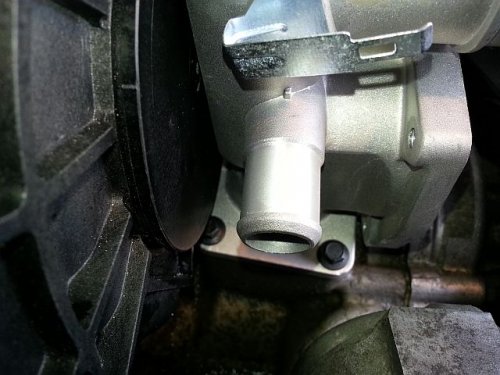
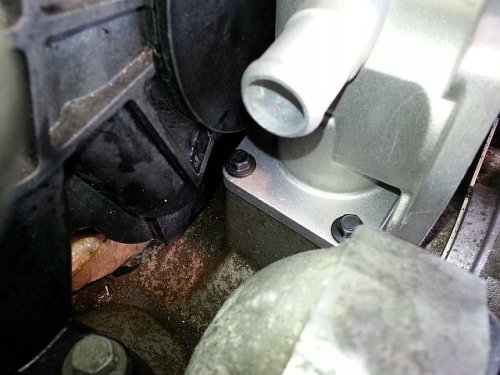
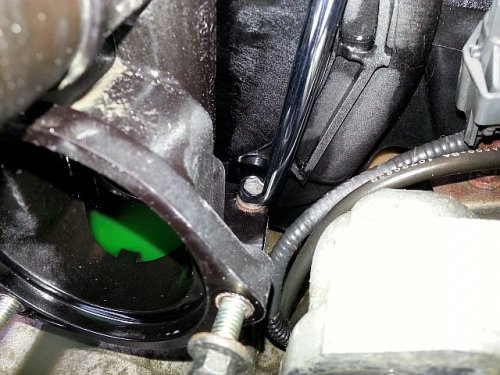
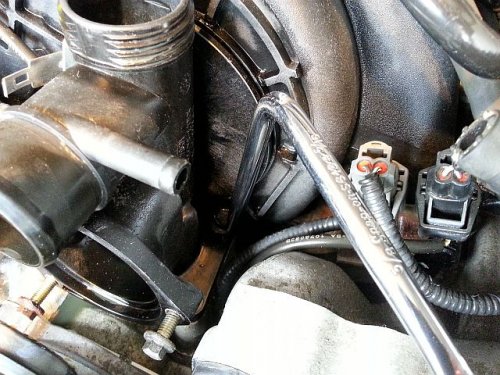
... that the two back bolts (5/16") are a PITA to get at ...

jag4b.jpg
jag4a.jpg
jag5a.jpg
jag5b.jpg

.. without the right tool.

jag6.jpg
jag6b.jpg

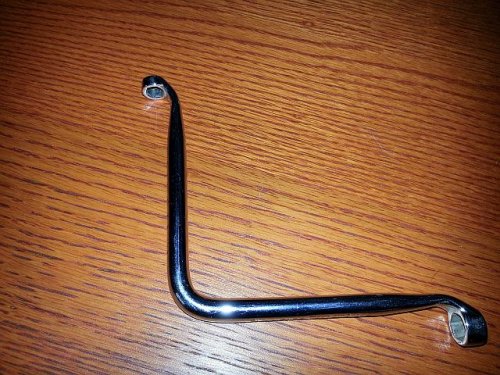
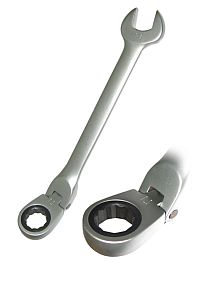
A 5/16" or 8mm swivel ratchet wrench would also do the job.

wrench.jpg

When you snap it loose and begin to back the bolt out, it's going to raise
and start bumping into the black housing of the intake (round black disk).

jag6a.jpg

You'll want to switch to an open end wrench to help it along until it does bump into the black plastic housing.

I was able to lean the Thermostat Housing forward and backwards a bit while lifting up on it ...
and with a pair of needle nose pliers make the remaining few turns to loosen the bolts completely.

Careful not to drop anything down into the housing intake chamber. That would suck!

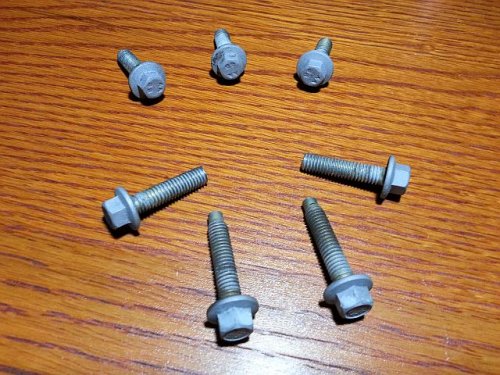
The two back bolts need to either be replaced with something shorter or shaved down a bit as to ease installation.

jag7.jpg

I opted to just put two of the set of bolts on the grinder and shaved them down and sandblasted them to clean up the rust a bit.

jag1.jpg


jag2.jpg


jag3.jpg


jag4a.jpg


jag4b.jpg


jag5a.jpg


jag5b.jpg


jag6.jpg


jag6a.jpg


jag6b.jpg


jag7.jpg


wrench.jpg
 
Re&RE OEM Coolant Outlet Pipe

Didn't get a whole lot of pics of this one in progress, pretty straightforward though.

outletpipe.jpg

5/6" or 8mm bolts, two per side, goes back on the same way it came off.

It is advised to remove the rubber gaskets which will end up sticking to the metal housing outlets.
Clean the housing sealing surfaces with some steel wool, scrape any buildup off and smooth out
the outlet housing before adding the new Coolant Outlet Pipe.

Be sure to keep an eye on the rubber gaskets, making sure they are seated correctly.

Little bit of Anti-seize onto the bolts before the go back in is always a good idea.

Pretty straight forward ...
reattach the upper rad hose later after completing the Re&Re of the Auxiliary Coolant flow pump and DCCV.

You need the room to work on those, so therefor the upper Radiator hose is left off at this time.

icon4.gif
It's my understanding that the GEN 1 V6 does not have an Auxiliary Coolant Flow Pump
and along with a Coolant Outlet Pipe, it also has a Coolant Inlet Pipe.

Seems the GEN 1 V8 only has a Coolant Outlet Pipe and no Inlet Pipe.
Also the GEN 1 V8 includes the required Auxiliary Coolant flow pump.

(correct me if I'm wrong)

outletpipe.jpg
 
Re&Re Auxiliary Coolant Flow Pump

Symptoms: No heat at idle and/or low RPM's

Direct Cause: Faulty worn out Auxiliary Coolant Flow Pump.

Correction: Replace Auxiliary Coolant Flow Pump with OEM part only. (p/n 1W4Z-18D473-AA)

Clipboard01.jpg


Removal and Installation aka: Re&RE

1) Disconnect the battery ground cable.

2) Drain the radiator. * Upper rad hose should be out of way also.

3) Disconnect the connector.

s1x~us~en~file=a0000960.gif~gen~ref.gif

flowvalve.jpg

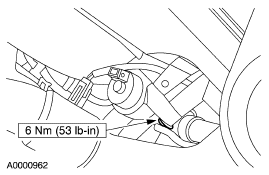
4) Remove the two auxiliary coolant pump to fan shroud bolts.

s1x~us~en~file=a0000962.gif~gen~ref.gif

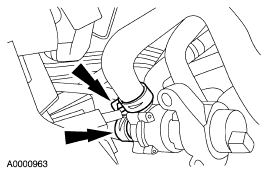
5) Disconnect the hoses and remove the pump.

s1x~us~en~file=a0000963.gif~gen~ref.gif

flowvalve2.jpg

6) To install, reverse the removal procedure.

icon4.gif
Make sure that the heater hoses are installed in the correct position.

icon4.gif
Lubricate the coolant hoses with MERPOL® meeting Ford specification ESE-M99B144-B or plain water only, if needed.

icon4.gif
Check for correct hose installation by verifying DATC system operation.


:eek:

s1x~us~en~file=a0000960.gif~gen~ref.gif


s1x~us~en~file=a0000962.gif~gen~ref.gif


flowvalve.jpg


s1x~us~en~file=a0000963.gif~gen~ref.gif


flowvalve2.jpg


Clipboard01.jpg
 
Re&Re Dual Coolant Flow Valve (DCCV)

~ reserved

(in progress)


---- EDIT: I'll get to updating this later this evening (Monday April 1st).
 
Big....would you email the DCCV removal instructions to my gmail address? My buddy just had his crap out andiis hell bent on removing himself even though the mechanic said he would do his as well for the $40.
 
Good work BigRig! Everything always seems easier with pictures.

I will be doing this sometime this summer.
 
FWIW, because I know we have some younger members who have LSes but manage their money on a tight budget, there is a used Motorcraft DCCV on Amazon for $115 shipped. I know that brand new ones are $140 but it may be of use to someone.
 
Marcredd, PM me your email bud, I'll forward you some pdf's

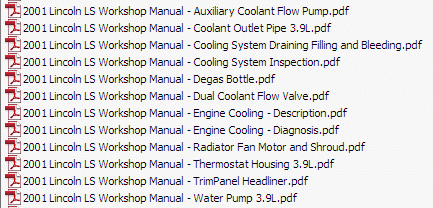
be aware, it's all GEN 1 2001, extracted pdfs from the workshop manual.

Which ones you want ?

Clipboard01.gif


I can forward all of them, only comes to 1.84Mb combined.
Anyone else needs these just PM me your email (FREE shipping from Canada).


+1 Ben, thanks!

Clipboard01.gif
 
PDF's sent as requested.

Macredd please note:

The Dual Coolant Flow Valve (DCCV) PDF illustrates a couple of things that were not practical.

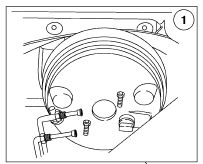
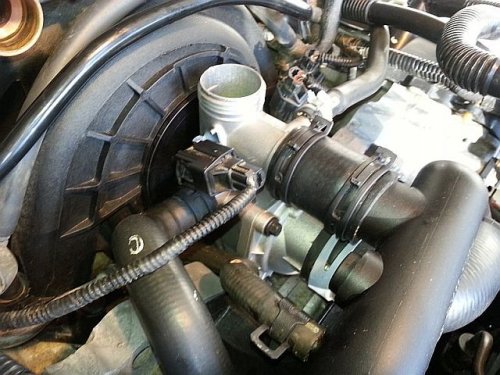
1) The Auxiliary Coolant Flow Pump, on the GEN 1 V8 is located on top of the DCCV and needs to be moved out of the way first with it's hoses for much better access to the DCCV.

2) another procedure mentions loosening the receiver drier and moving it aside, which was in fact not needed.

3) It's near impossible to work on the DCCV from down below, all work was done from above with the Aux. pump out of the way.

4) the mounting plates on the very front of the grille, that holds the top of the radiator were removed earlier on in the process and thereby allowed the rad with it's shroud to give way a little.

5) In the Dual Coolant Flow Valve (DCCV) removal process it talks about disconnect the three quick-disconnect couplings from the coolant control valve hoses. I was told by someone who I trust and who works on cars everydays for a living, to stay far away from those fittings as over time they deteriorate and become brittle and 90% of the time they break while attempting to undo them, also that moving any lines that old that are cooling related, you move them the wrong way or just a little and it starts leaking.

6) I ran into some other documentation that suggested removing the DCCV at the firewall on the connections going into the heater core. This is also not advisable as there is a set of what looked like AC cooling lines attached to the metal lines going to the DCCV. Nightmare to undo it that way and was told to not mess with those lines unless I wanted leaks.

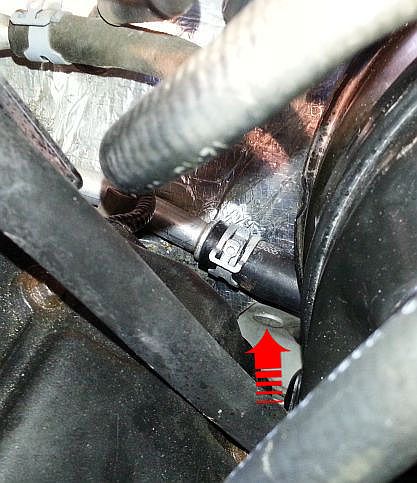
... in a nutshell, it's with the top rad hose already out of the way, remove the Auxiliary flow pump out of the way then find access to the DCCV deep down. removing all clamps with an extended hose clamp removal tool and assist the hoses off and on with a large screw driver.

You can get your right hand down in there below just directly where the fan scroud starts digging into your skin on the inside of your arm.

It's not a pleasant experience, watch all the hoses and clamps, they have to go back where they came from or the system will be messed up. the hoses are preformed and will generally stay put in the direction they are to be reattached.

the DCCV is attached with two rubber fastners to it's own bracket, you will not get that undone, the bracket has two bolts that need to be undone, one bolt has to come all the way out, the other near the fan side, has to be just loosened as the bracket just hooks around the bolt. (not through it)

... sorry man, it's not easy to describe it, it's in my opinion a bitch to get done but very possible.
 
Bitch and $40 sounds like a perfect couple for me. Thanks for the email and additional info here.
 
you need to dump that old car for a gen2 v6. it will only take ya an hr:
1.undo electrical connector
2. remove/clamp hoses
3. remove bolt & part.
4. reverse directions to install

i dont even think i got dirty..
 
you need to dump that old car for a gen2 v6. it will only take ya an hr:
1.undo electrical connector
2. remove/clamp hoses
3. remove bolt & part.
4. reverse directions to install

i dont even think i got dirty..


No !!! ... no dumping.
 
you need to dump that old car for a gen2 v6. it will only take ya an hr:
1.undo electrical connector
2. remove/clamp hoses
3. remove bolt & part.
4. reverse directions to install

i dont even think i got dirty..

Dump the old car? Not happening. And definitely not for a v6.
 
Paid for it---

After reading all of the instructions, I decided to pay for my DCCV replacement. Just $390..But it works as it should now.

If anybody has ever 'repaired' one of these or wants to try, I kept the original.
 
hehe, normally I would pay my mechanic buddy as well but I'm determined to learn this LS and work on it as much as I can myself. I was in for a bit more than just a DCCV though.

Good stuff, glad it work out for ya. Nice to have some proper heat again though.
 
My appt got pushed back for a week due to a sickness in my mechanic's family.
 
Got er done :D

First I want to thank everyone - JoeGR BigRig etc. This forum is great for LS owners with a little bit of wrenching skills...I swapped out the DCCV in a little over and hour and did the whole repair for around $100 which I am sure would have cost 4x as much at the dealer. On a Gen2 it's not too bad as access to the unit is pretty clean. The hardest part is getting the hoses off the old unit since there is not much room to move around and mine were on pretty good..The good news is the swap cured my problem.

One thing I do notice now is that in "AUTO" mode it seems like I need to move the temp register up higher than before to get the air temp to start blowing warmer. Today when my external temp showed 65 I had to move the register up to around 73 before it felt like AC was not blowing a little cool. No big deal just a change and maybe the unit needs to "break-in" or now its just working closer to "new spec". I was thinking maybe disconnect the battery for a while to have the whole system reboot. Thoughts?
dccv1-1.jpg
 
... maybe the unit needs to "break-in" or now its just working closer to "new spec". I was thinking maybe disconnect the battery for a while to have the whole system reboot. Thoughts?

No need. There's no learning for the valve. Your system is now working the way it is supposed to.
 

Members online

Back
Top