Gen2 V6 Coil, Plug, Gasket, IMT valve replacement

n8bachelor

Dedicated LVC Member
Joined
Dec 30, 2005
Messages
1,622
Reaction score
12
Location
Bentonville, AR
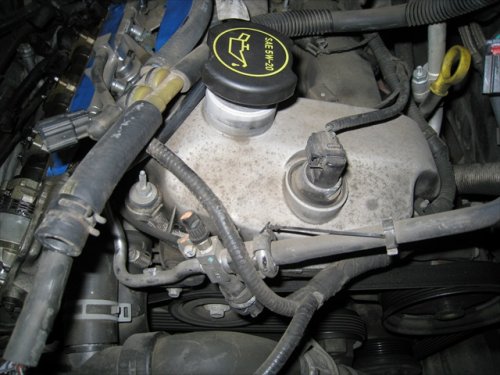
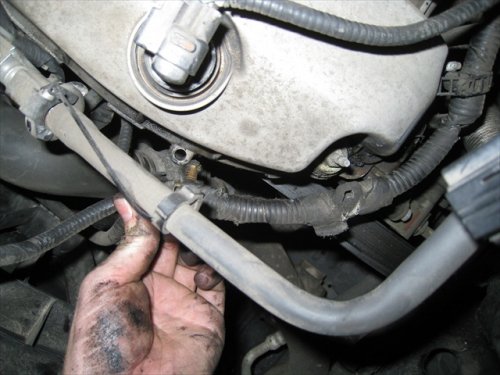
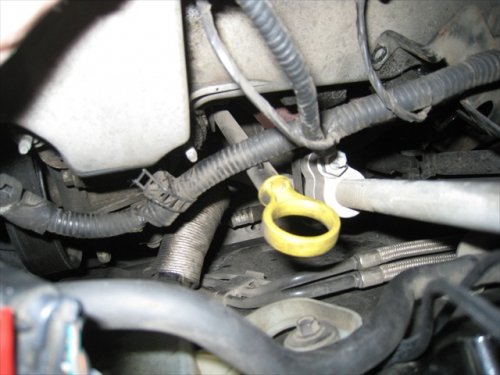
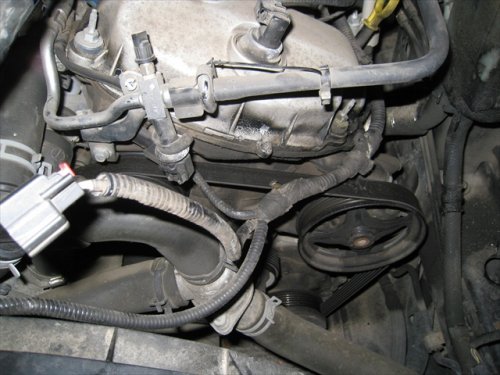
OK folks. Here's the deal. I replaced the plugs, coils, upper and lower intake manifold gaskets, pcv valve & elbow, and intake manifold tuning valves about 6 months ago and am finally getting around to posting the howto photos. I took a lot so stay with me.

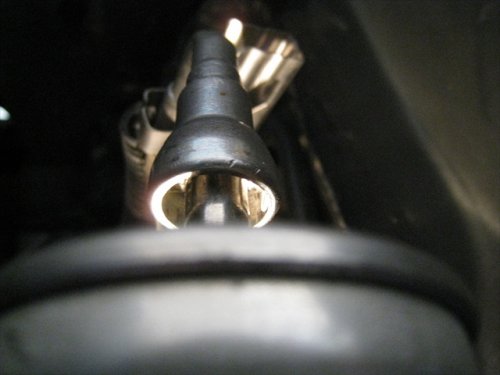
To start out I had some trouble getting the fuel filter off. Guess I messed it up. Took it to the dealer later for $50.
Service_004.jpg

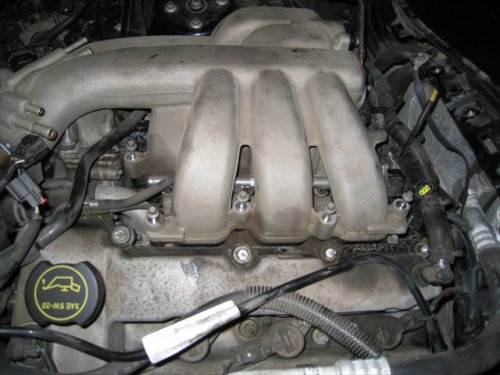
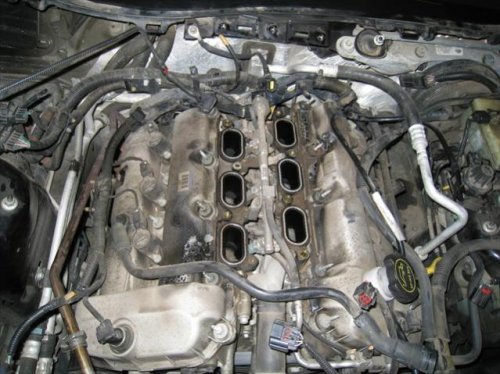
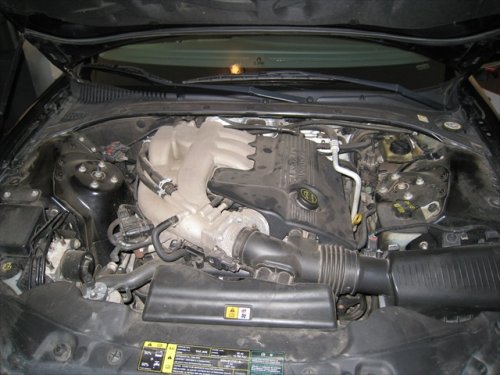
And here we start with the engine... dirty I know.
Service_005.jpg

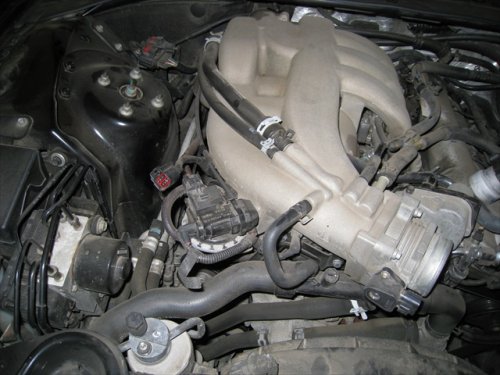
Remove the intake filter and hose and note the other hoses connected to the intake manifold.
Service_008.jpg

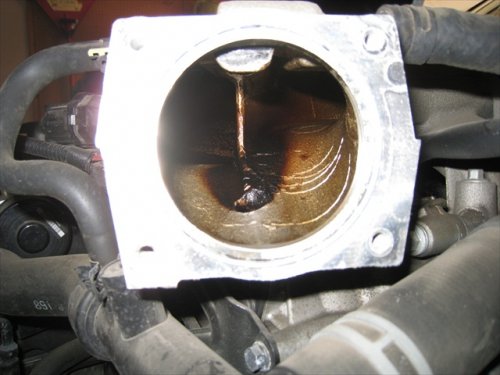
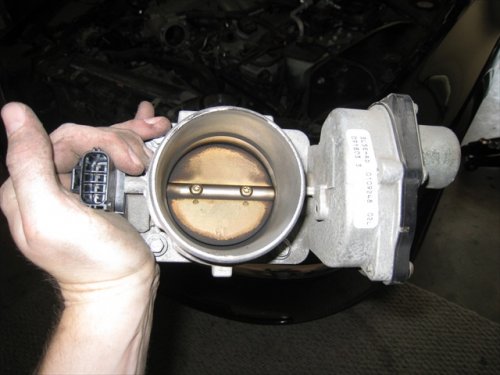
The throttle body was a bit dirty. I cleaned it with brake cleaner and shop towels.
Service_009.jpg
Service_010.jpg

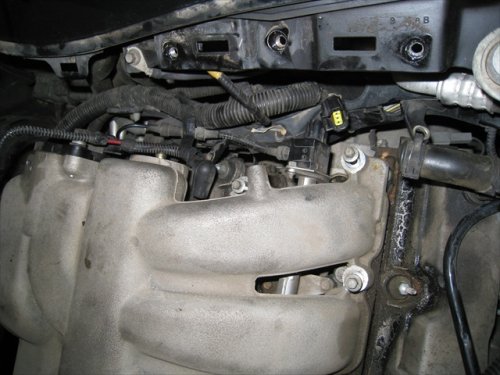
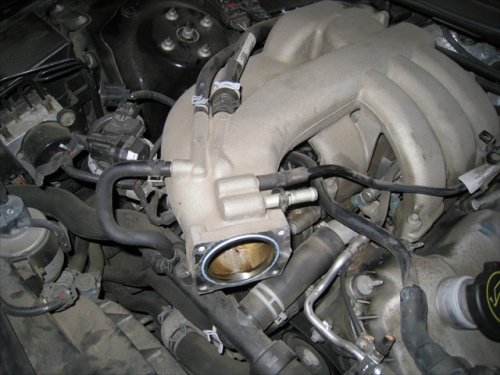
Again, make note of the hoses and connections to the intake manifold
Service_012.jpg

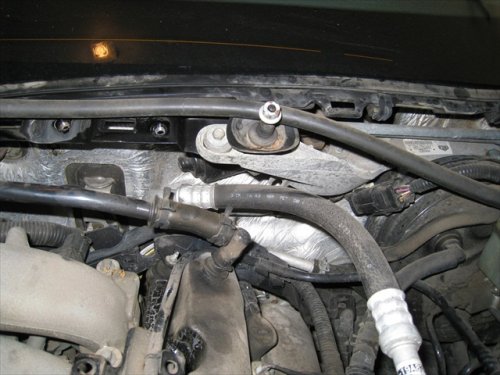
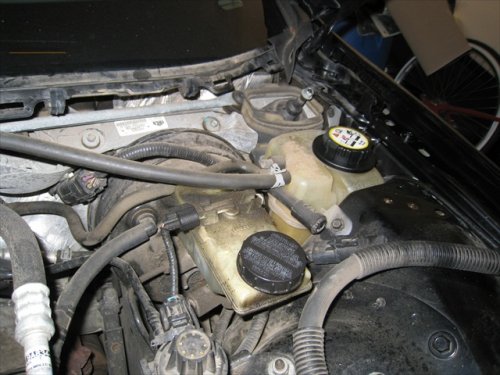
Remove the cowl vent screen and the front tower brace. Mind the windshield washer tubing.
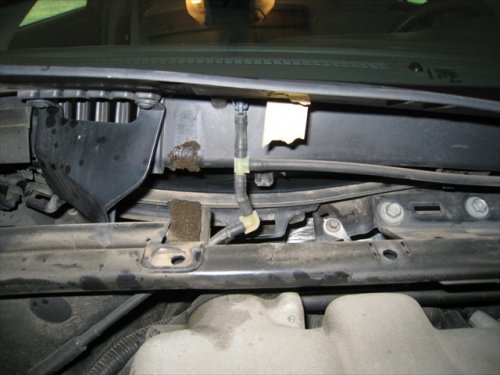
Service_013.jpg

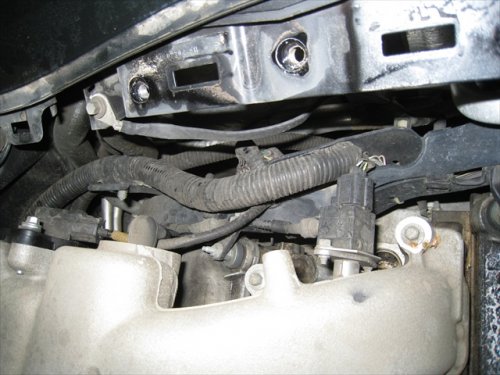
Begin removing the electrical connections, vacuum and cooling tubes from the intake.
Service_014.jpg
Service_015.jpg

Service_004.jpg


Service_005.jpg


Service_008.jpg


Service_009.jpg


Service_010.jpg


Service_012.jpg


Service_013.jpg


Service_014.jpg


Service_015.jpg
 
Last edited:
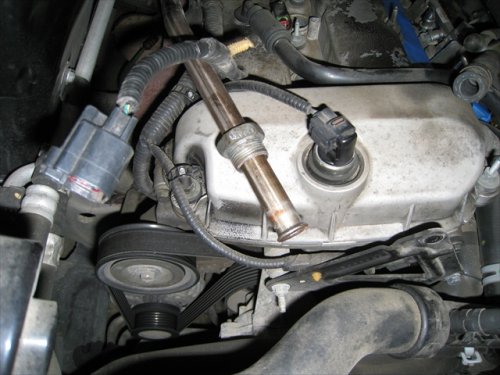
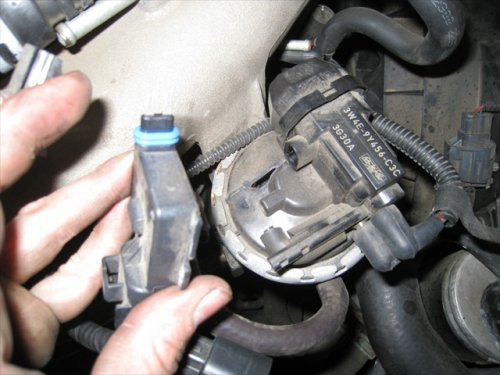
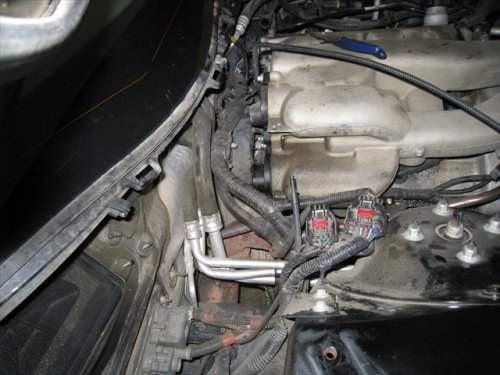
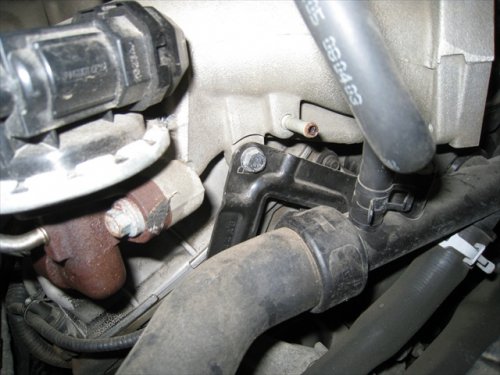
Disconnect the EGR valve. I slipped on the bolt removal and broke a couple tabs on the EGR valve. It was easily repaired.
Service_016.jpg
Service_017.jpg
Service_018.jpg

Note the progress so far. PCV valve is exposed.
Service_019.jpg
Service_020.jpg

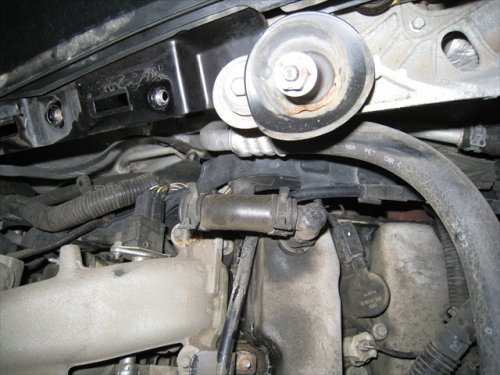
Note the coolant hoses. And the electrical harness behind the engine.
Service_021.jpg
Service_022.jpg

Go ahead and replace the PCV valve and elbow. I had to use a C-clamp to press them together since each was hard plastic and nearly the same diameter.
Service_024.jpg

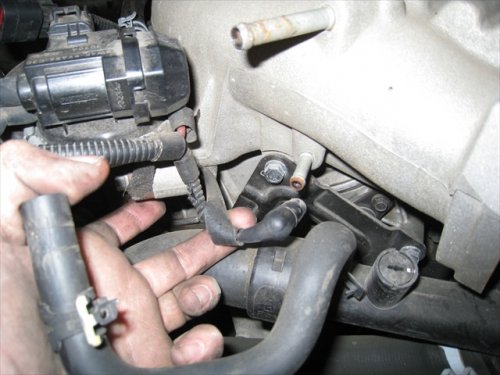
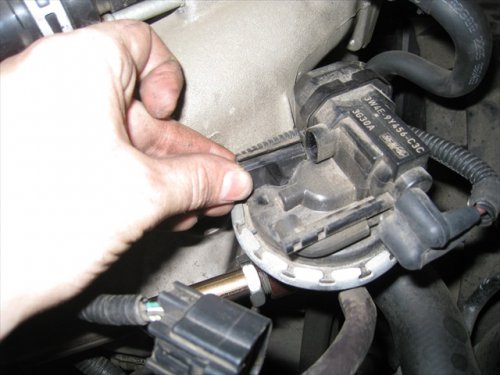
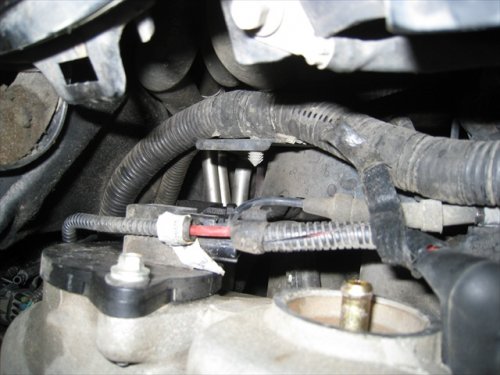
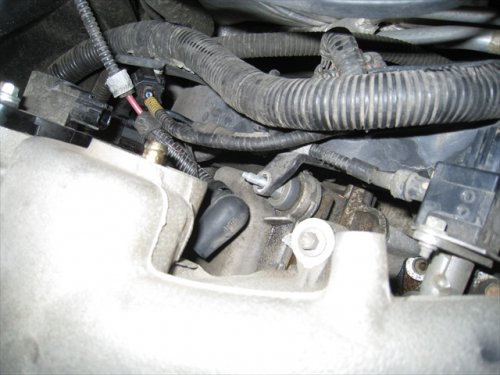
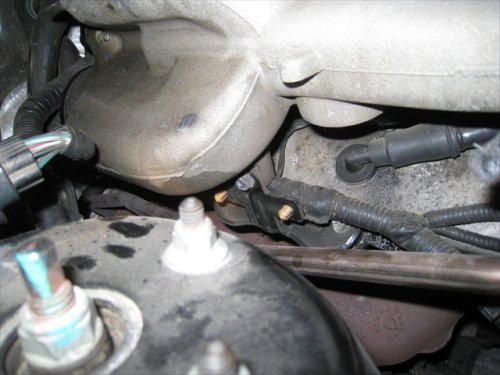
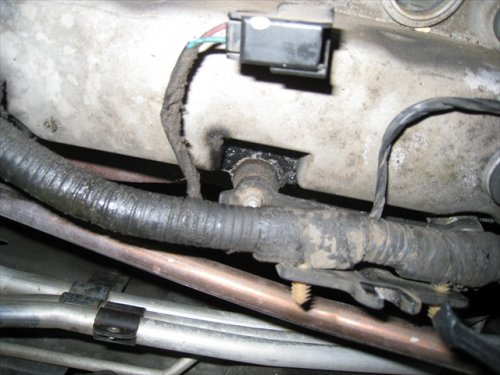
Upper IMT valve is show with the vacuum hose unplugged.
Service_028.jpg

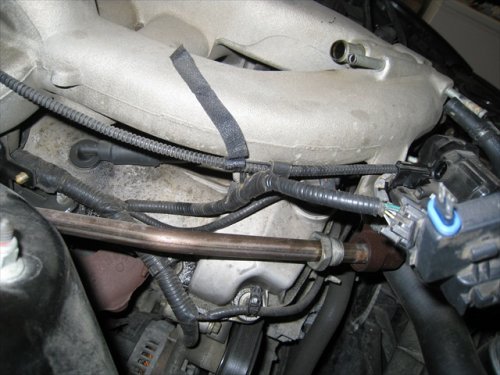
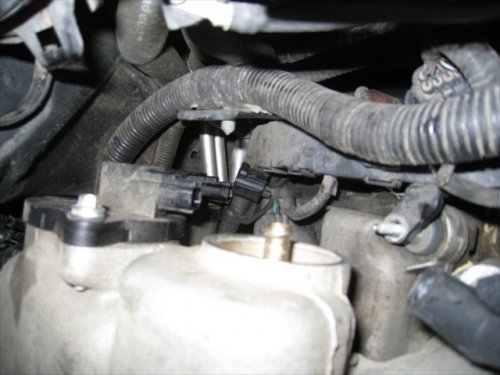
IMT valves unplugged and electrical harness unbolted.
Service_031.jpg

Service_016.jpg


Service_017.jpg


Service_018.jpg


Service_019.jpg


Service_020.jpg


Service_021.jpg


Service_022.jpg


Service_024.jpg


Service_028.jpg


Service_031.jpg
 
Last edited:
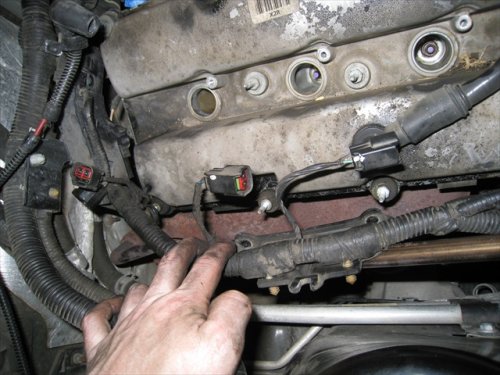
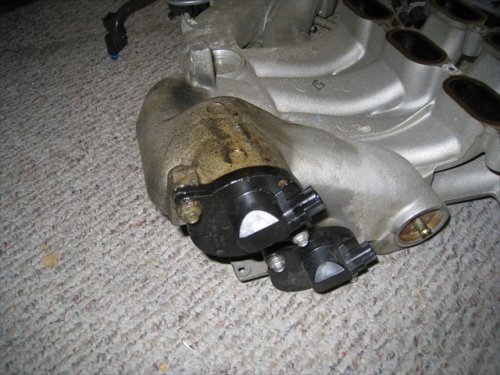
IMTs disconnected and cabin intake filter and housing removed. You can see the oil discoloration on the intake manifold, caused by a leaking IMT valve.
Service_039.jpg
Service_041.jpg
Service_046.jpg

Here is the bolt I did not immediately remember during re-assembly. This is the only photo I had to look up.
Service_047.jpg

Wiring harness on passenger side removed. Then the passenger side bolts removed from the intake manifold.
Service_035.jpg
Service_048.jpg
Service_049.jpg

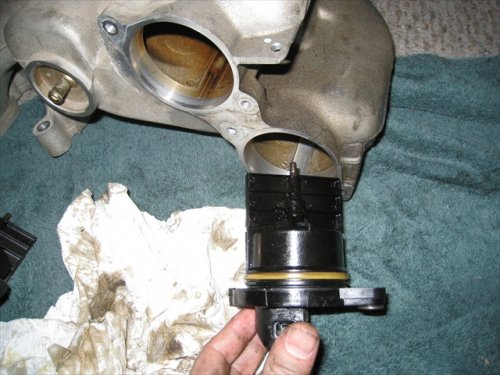
Intake removed, IMT valves exposed. O-rings were easily replaced by removing 2 bolts holding each IMT valve.
Service_051.jpg
Service_053.jpg

Service_035.jpg


Service_039.jpg


Service_041.jpg


Service_046.jpg


Service_047.jpg


Service_048.jpg


Service_049.jpg


Service_051.jpg


Service_053.jpg
 
Last edited:
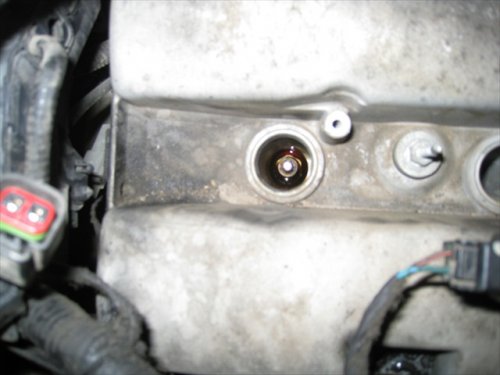
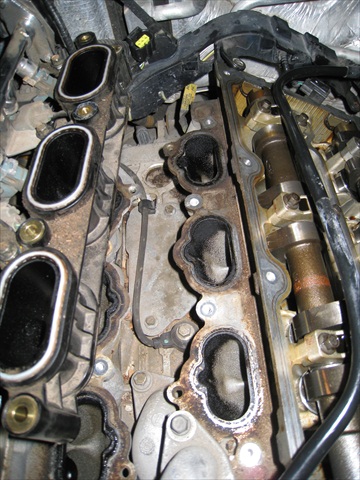
Here's the valve covers exposed with the intake removed. Tape the intake ports so no gunk gets in there (Thanks Lou).
Service_052.jpg
Service_054.jpg

Connections to be removed.
Service_055.jpg
Service_056.jpg
Service_057.jpg

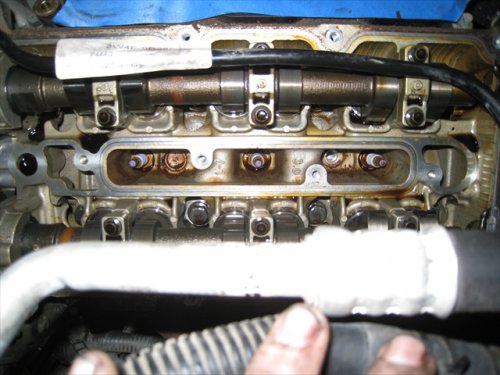
Coils removed and oil in the wells (3 of 6 if I recall correctly). This explains the misfire. I replaced all coils and plugs. Kept the old coils in case there are still some good ones in there.
Service_058.jpg
Service_060.jpg
Service_061.jpg
Service_062.jpg

Service_052.jpg


Service_054.jpg


Service_055.jpg


Service_056.jpg


Service_057.jpg


Service_058.jpg


Service_060.jpg


Service_061.jpg


Service_062.jpg


Service_063.jpg
 
Last edited:
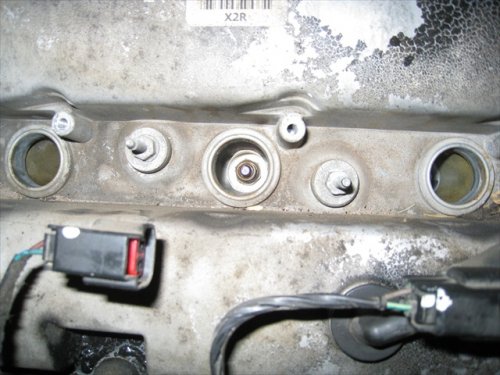
6 bolts later and the passenger side valve cover gasket is off.
Service_065.jpg

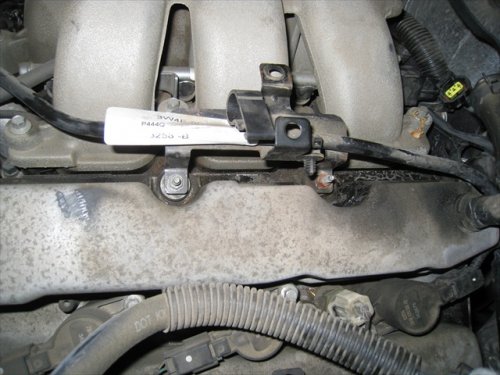
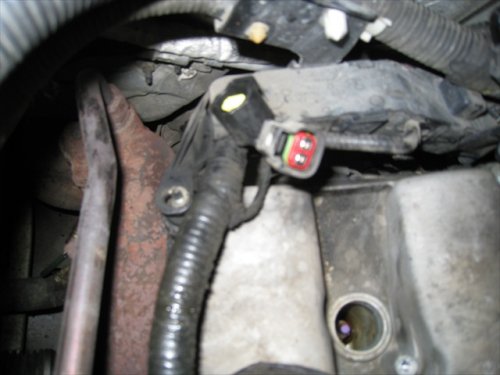
A few connectors for the driver side... including electrical, fuel, aircon, oil, and what appears to be a temperature sensor.
Service_068.jpg
Service_069.jpg
Service_070.jpg
Service_071.jpg
Service_073.jpg
Service_074.jpg

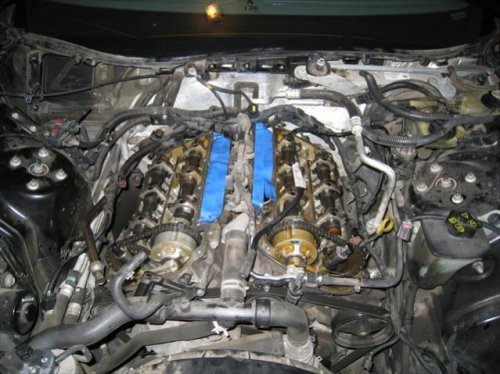
And now both valve covers are gone and all sorts of fun stuff is exposed.
Service_075.jpg
Service_076.jpg

Service_065.jpg


Service_068.jpg


Service_069.jpg


Service_070.jpg


Service_071.jpg


Service_073.jpg


Service_074.jpg


Service_075.jpg


Service_076.jpg
 
Last edited:
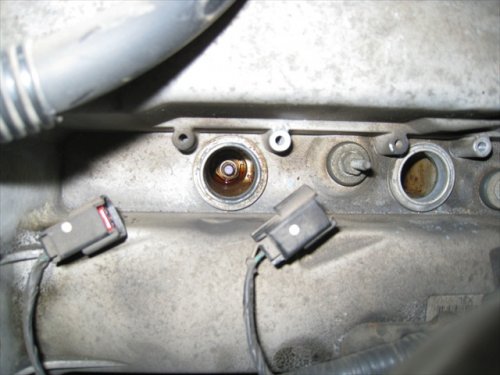
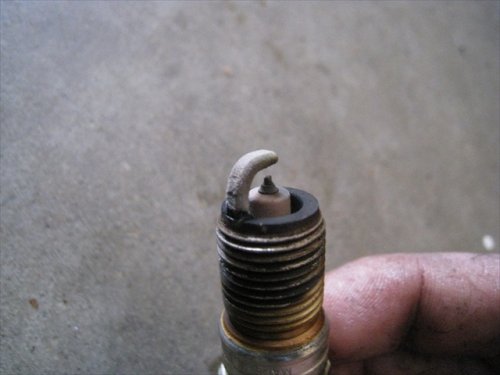
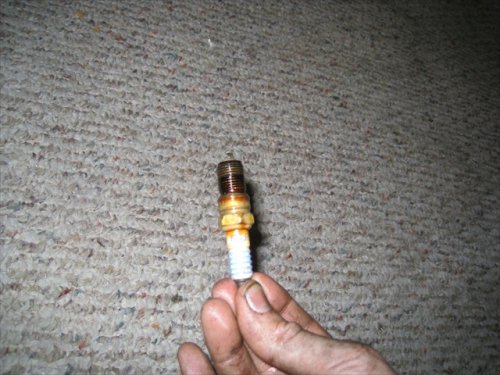
Some plugs were covered in oil, some were not.
Service_078.jpg
Service_083.jpg

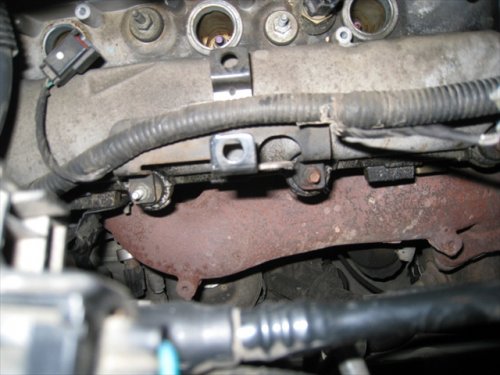
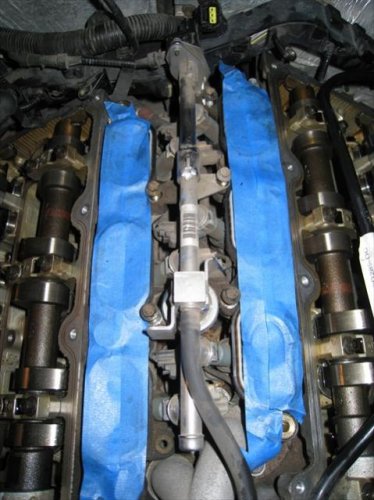
Next was the fuel rail (injectors) removal. This one was tricky due to the electric connectors. I was not able to completely remove it. I just pushed it out of the way to get to the gaskets. Note the PCV valve is not under the injectors on the Gen2 v6 like it is with the Gen1.
Service_084.jpg
Service_085.jpg

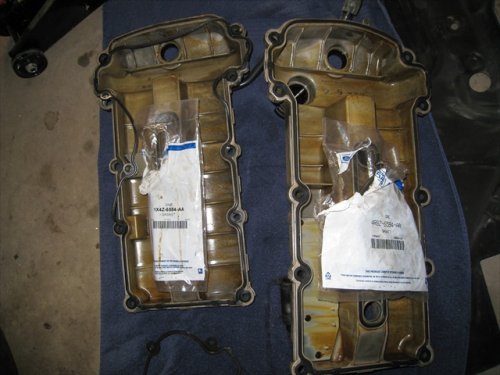
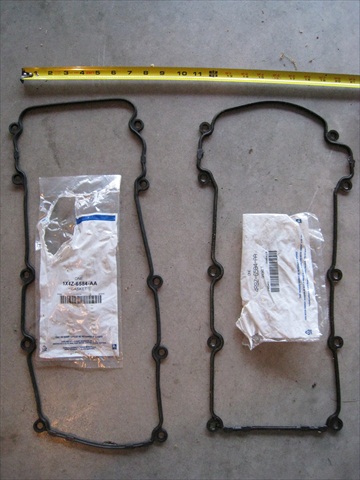
I had a little mix-up with the parts I ordered. Somehow I got two identical valve cover gaskets even though they had different part numbers. Ended up re-using the passenger side temporarily while I got the replacement part from Max. The valve cover photo is misleading, they are not really that different in size.
Service_086.jpg
Service_090.jpg

Service_078.jpg


Service_083.jpg


Service_084.jpg


Service_085.jpg


Service_086.jpg


Service_090.jpg
 
Last edited:
You had me until EGR valve.

Pictures definitely help, but I still can't tell what's what. I give you props because I can't do this crazy sh1t. I'll need somebody to personally walk me through doing this because I'd mess up the wiring or the plug/coil placement. What kind of tools do you need other than a wrench?
 
A few corrections I noticed on the first read. Please not that I'm only correcting you so that you can revise your write-up which you've clearly taken some time to write and I just want to help you make it better. I'm not trying to be an a**hole. Thanks for taking the time to do this.

1. When you say; "Upper IMT valve is show with the coolant hose unplugged" it should be a vacuum hose, not a coolant hose.

2. "Wiring harness on passenger side removed." Again, it looks like vacuum lines, EVAP maybe?

3. "I believe 6 bolts later and the passenger intake is off." Did you mean 6 more bolts on the passenger side then the intake was off or did you mean that you took the passenger valve cover off?

4. "A few connectors for the driver side... including electrical, fuel, aircon, oil, and what appears to be a knock sensor." If you're stating that in order then the last one which is in the middle of the valve cover and is partially removed is the cylinder head temperature sensor.

5. "Next was the fuel rail (injectors) removal." This is called the lower intake, but minor detail. I remember you doing this a while back and misleading you on where the PCV valve was, sorry.
 
Thanks for posting this, I did the coils on the drivers side, figure I'll be doing the others at some point. Not sure if I'll tackle it or have my mechanic do it.
 
A few corrections I noticed on the first read. Please not that I'm only correcting you so that you can revise your write-up which you've clearly taken some time to write and I just want to help you make it better. I'm not trying to be an a**hole. Thanks for taking the time to do this.

1. When you say; "Upper IMT valve is show with the coolant hose unplugged" it should be a vacuum hose, not a coolant hose.

2. "Wiring harness on passenger side removed." Again, it looks like vacuum lines, EVAP maybe?

3. "I believe 6 bolts later and the passenger intake is off." Did you mean 6 more bolts on the passenger side then the intake was off or did you mean that you took the passenger valve cover off?

4. "A few connectors for the driver side... including electrical, fuel, aircon, oil, and what appears to be a knock sensor." If you're stating that in order then the last one which is in the middle of the valve cover and is partially removed is the cylinder head temperature sensor.

5. "Next was the fuel rail (injectors) removal." This is called the lower intake, but minor detail. I remember you doing this a while back and misleading you on where the PCV valve was, sorry.

Corrections made.
 
k this is the greatest thread ever. one question before i tack this later this week: the very beginning of ur post confused me a little i think... so u changed valve cover gaskets, upper intake manifild gasket and the lower intake manifold gasket? and that's why the fuel rail had to come off? to get to the lower manifold off?
cuz i think i got confused also about the " 'Next was the fuel rail (injectors) removal.' This is called the lower intake, but minor detail."
both came off correct? ( i think it just took me a while to realize that the one picture was of the fuel rail and lower intake manifold removed. but i think now i can see how the intake ports on the right sit lower that on the left with that manifold removed)

anyway, thank u so much for this.

You're welcome. I'm glad I could help. The tech section at the top of the site shows the gen 1 v6 engine work. I used that and took lots of photos to document my work.

The fuel rail and Lower Intake Manifold come off together. Well, they didn't really come off as I could not detach the electrical connector, I just moved it out of the way to get to the lower gaskets. They did not really need to be replaced but I had the parts and I was in there anyway. There were 6 upper and 6 lower gaskets for the lower intake manifold.

If you're in there to replace plugs and or coils, be sure to replace the valve cover gaskets if there is oil in the wells.

Max at Champion Ford did me well for parts and prices.
 
Having done the work myself it cost me about $540 in parts and about 8 hours in time (I got stuck a couple times, see fuel filter). I did replace all 6 coils and plugs, which is where most of the cost was. See price quote from Max here:
http://www.lincolnvscadillac.com/showthread.php?t=71561

Shady local dealer wanted about 5 hours labor to do the job and his parts quote was near $800. He also didn't know why I wanted to replace all the plugs and coils if only one or two were fouling. I'm never going back there...

Hope that helps.
 
Yes that helps alot. Im getting this done next week at a local shop. Can you tell an improvement overall?
 
'05 ls imt o-rings

For LS owners that have arrived here like I did, and just need to replace the -rings:

Pop off the wipers, remove the plastic cowl cover retainers - unplug the washer line where there's an inline straight rubber connector near the right strut tower. No need to even remove the strut tower brace, if you don't want - I just removed the top valve out the top, and the bottom valve out the bottom...BUT...just for the heck of it, I then removed the brace, and it DID make it easier - that way, I could put both valves back in from the top. O-rings were a gyp - $9.00 apiece at my Lincoln dealer - I checked, and it was the same cost at a Ford dealer.

The big problem with getting the bottom valve out is a wiring harness that's in the way. It's attached to a steel retainer that is inserted into another plastic wiring harness retainer. I had to pry up on that steel piece and pop it out of the plastic part, and also unbolt the wiring harness from the right strut tower. It sounds harder than it is, and once that was done, I could move the wiring harness out of the way. For removal of the valve, I moved the harness UP, and easily pulled the valve out through the bottom. Once I took the strut tower brace off, I had easy access from the top, and pushed the wiring harness DOWN out of my way, and inserted both valves from the top. After inserting and bolting in the bottom valve, I plugged in the electrical connector - it was a little awkward, and the connector on the valve points in a semi-downward direction; it would have been easier and better to have inserted the valve with it rotated so the connector was more accessible, and then rotated it into the proper position and bolted it in (that's what I did with the top valve!). After I inserted and connected the bottom valve, I re-inserted the steel wiring harness retainer into the plastic piece, but didn't press it down all the way so it locked in...just in case I need to pull it out/move it again. Top valve was a piece of cake.

No burning oil smell this morning - so far, so good.
 
Thanks n8bachelor for the directions on this, it was a time consuming job but was a real easy job. I just wanted to add in a easier way to put the PCV valve on the elbow. We used a hairdryer and heated up the elbow and the PCV valve went right on, I was a little scared to do the C-clamp way, but I'm glad it worked for you. Thanks again great pictures and it made the job really easy.
 
Rock Auto was cheaper on Motorcraft coil packs and plugs than my local dealer. You might look at them to ompare local parts prices.
 
Thanks for the tip mr5, I have used Rock Auto for many parts recently. I appreciate you bumping my old thread for visibility too. I've since replaced my 04 v6 with a low-mile 06. I'm looking forward to some upgrades but first, the AirCon needs some work. It is getting hot out and it is making some noise and not cooling properly.
 
Thanks n8!

N8 bachelor,special THANKS.....Mr5,Kholtzclaw,BigRocco.....thanks also.I'm getting ready to repair my '04 V-6 with this awesome info. N8 and you folks posted.I think if we don't have one already I'd love to see this info. on a tutorial at the top of the forum list,since this IS a stinky recurring problem.
I'll try the repair tomorrow AM,I think.
Here's the number of the O-rings that Ford recognized just now and ordered in for tomorrow. 87072-S91
THANKS,again! Great forum! don-ohio :)^)
 
Just as some input, recently replaced my imtv o-ring, and there was only 1. Guess that's another difference between the 2 gens. Mines a 01'
 
I want to say thanks again,and I did that job on the IMTV O-rings(10.00 apiece from Ford).The rings weren't leaking as far as I could tell,but they were covered in red silicone when I pulled them.
The job wasn't too hard,but I broke 1 of the strut brace bolts on each side of the car,so only one is holding each side now.LOL!
I guess my manifold must be the culprit after all,and with 125,000 mi. on the 2 coil on plugs I can't change, I'll hafta remove that upper intake anyway. don-ohio :)^)

N8 bachelor,special THANKS.....Mr5,Kholtzclaw,BigRocco.....thanks also.I'm getting ready to repair my '04 V-6 with this awesome info. N8 and you folks posted.I think if we don't have one already I'd love to see this info. on a tutorial at the top of the forum list,since this IS a stinky recurring problem.
I'll try the repair tomorrow AM,I think.
Here's the number of the O-rings that Ford recognized just now and ordered in for tomorrow. 87072-S91
THANKS,again! Great forum! don-ohio :)^)
 

Members online

No members online now.
Back
Top