RigsLS
Dedicated LVC Member
- Joined
- Mar 10, 2012
- Messages
- 7,756
- Reaction score
- 532
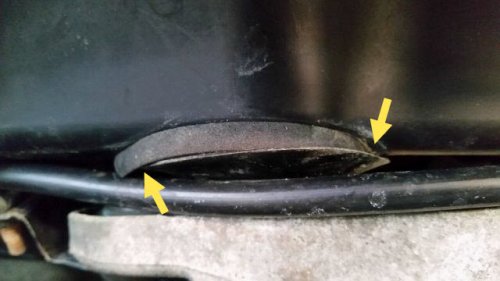
Symptoms: Water or Washer Fluid leaking down onto Engine near Coil covers, causing Ignition misfiring.
Direct Cause: Faulty worn out Passenger Wiper Arm Shaft to Cowl Seal.
Correction: Replace Foam Seal with OEM p/n 5W4Z-54021A46-A
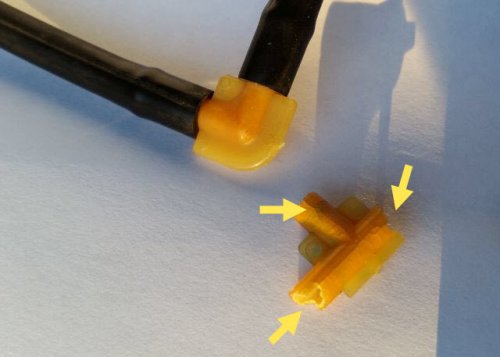
Symptoms: Weak Washer Fluid Spray, potentially leaking onto/near Coil covers, causing Ignition misfiring.
Direct Cause: Faulty worn out, deteriorated, cracked Washer tubing fittings.
Correction: Replace Windshield Washer Spray tubing, Elbow and Tee fittings
Removal and Re-install aka: Re&RE
1) Begin by removing the protective decorative rubber nut caps from both wiper arms.
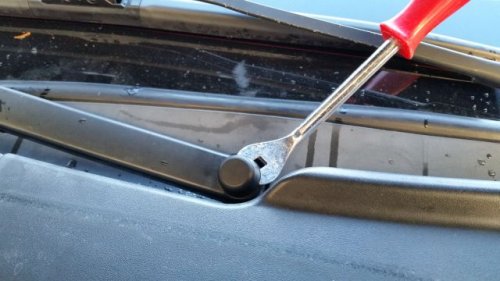
2) Undo the 13mm Wiper Arm shaft retaining nut.
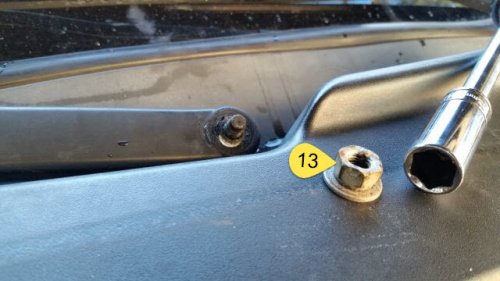
3) Gently fist bang downwards onto the Wiper Arm assembly to nudge it loose from it's shaft.
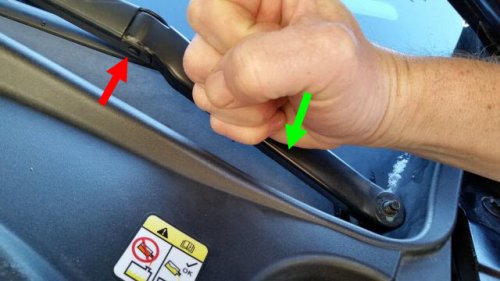
 May need to use some penetrating fluid or a pulley to break them free.
 Place a towel directly under wiper arm where the red arrow points to protect the glass.
 DO NOT allow wiper arms to smack onto the glass from the service position. You'll need a new windshield if you do.
4) Push down onto the Wiper Arm assembly to level it while removing it upwards from the shaft. Remove both Wiper Arms.
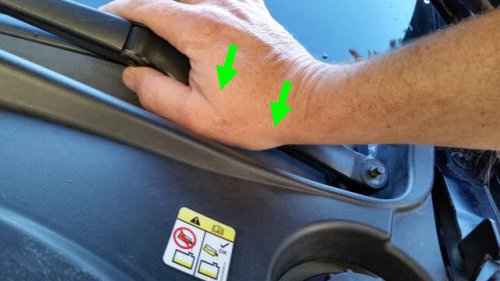
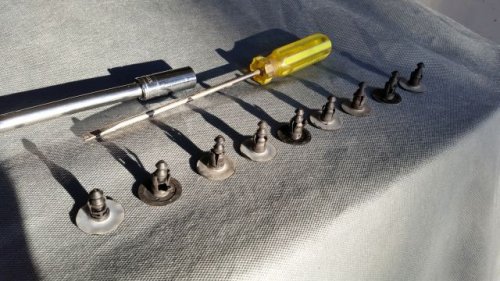
5) Gently undo all Cowl Push Type Retainer clips by pushing down into the center before pulling them up.
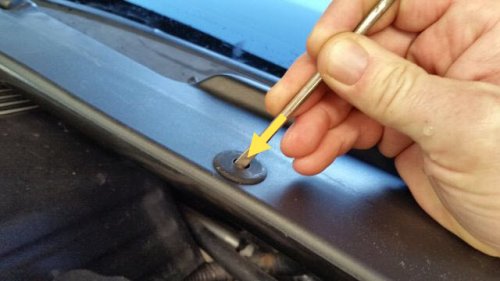
Don't forget the ones at either sides of the cowl.
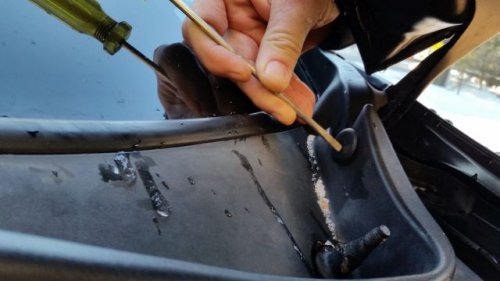
Qty 9 x Cowl Push Type Retainer clips - OEM p/n W705956-S300
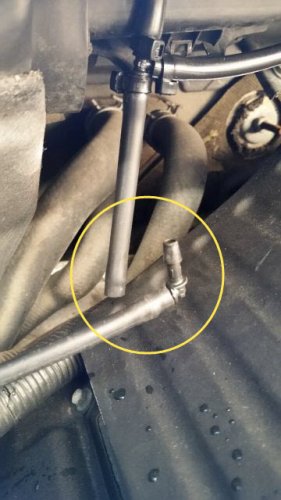
6) From the Passenger side, disconnect the main Washer Spray feed tubing at the elbow under the cowl.
 2000-2002, 1[SUP]st[/SUP] GEN LS owners can disregard this step. It's Washer system is fitted within the hood not the cowl.
7) Remove the plastic Cowl by firmly and evenly pulling upwards ensuring the sides come with it as a whole.
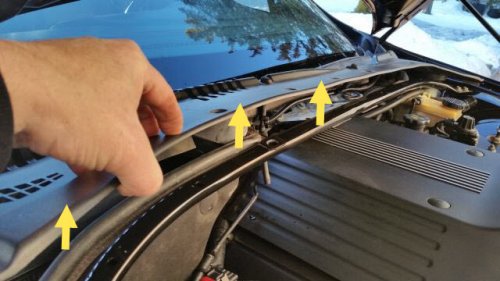
 Rubber boots on either side will need to be lifted up and out of the way for the cowl to come loose.
8) Inspect all seven cowl retainer clips, if any damaged or missing, they will need to be replaced.
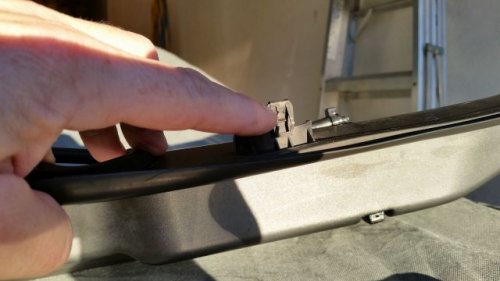
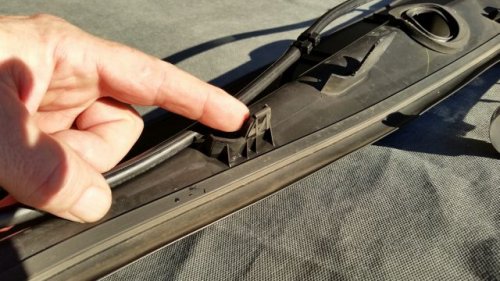
The eighth post serves as a guide, not a lock-in retainer clip like the others, it's located directly beside the passenger side Wiper Arm Shaft opening.
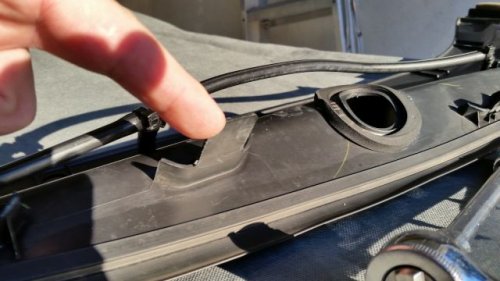
9) Those posts with the retainer clips on the underneath side of the cowl will need to fit directly back into their respective slots at the bottom glass rail.
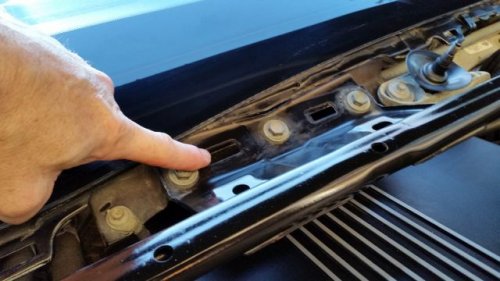
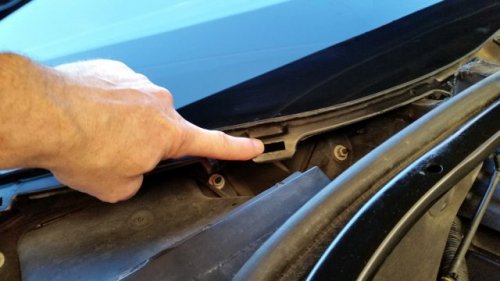
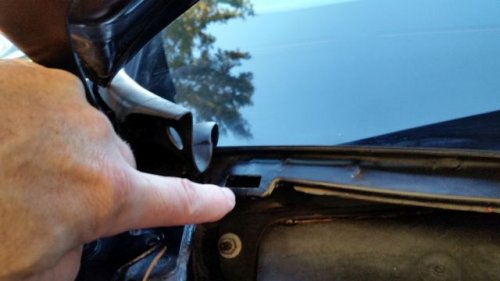
10) Wipe clean the rubber Wiper Arm shaft boot, if it's damaged or torn, an entire wiper arm assembly must be purchased.
 It may very well be possible to find a replacement boot from the scrap yards or a simple fix with some black silicone sealant.
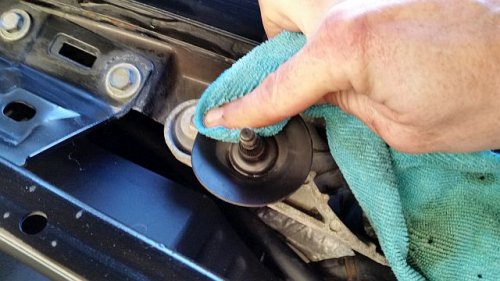
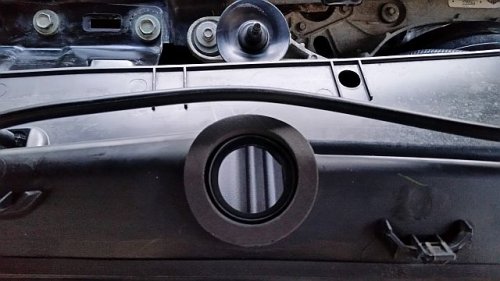
11) This is the Passenger Wiper Arm Shaft Foam Seal to be replaced - OEM p/n 5W4Z-54021A46-A

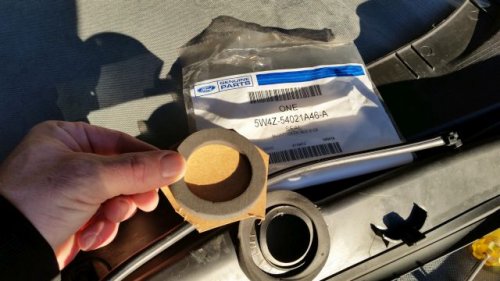
12) Begin to removed the old defective foam seal by means of cutting and or pulling it off.
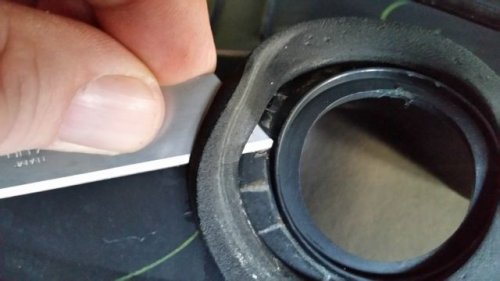
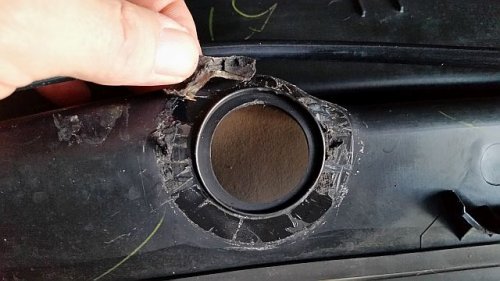
 Use some Goo-Gone to completely remove it and maintain a smooth clean matting surface for the new seal.
13) Affix the new replacement foam seal directly around the raised centered ring. Ensure an even dry clean surface!
14) If leaking issues with the windshield washer system, simply replace by means of rebuild, blow out the nozzles.
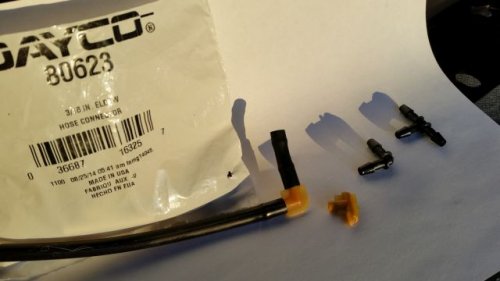
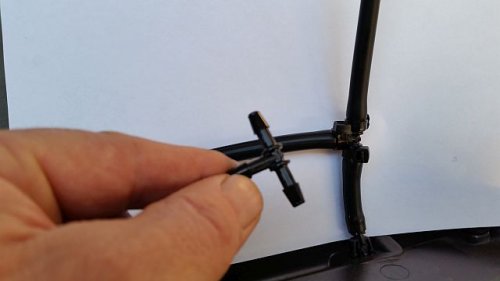
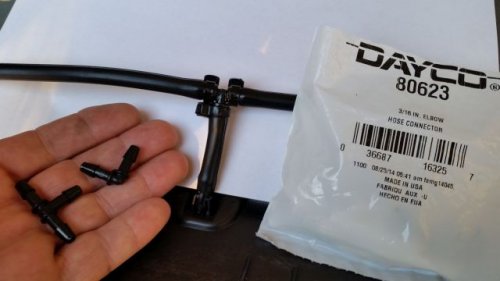
Locally obtained, Dayco 80623 Connector 3/16" Elbow & Dayco 80633 Connector 3/16 Tee
15) Reinstall the cowl with the new foam seal. Alignment is key.
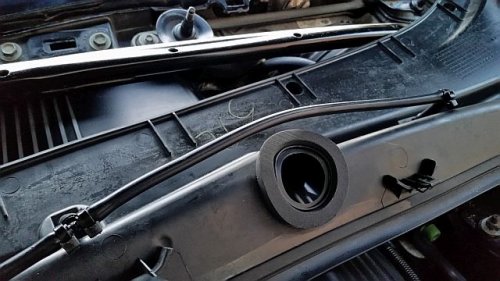
Guide post must align through correctly, evenly without obstruction.
Focus on middle install first then work outwards, OBSERVE both ends aim underneath rubber corner boots.
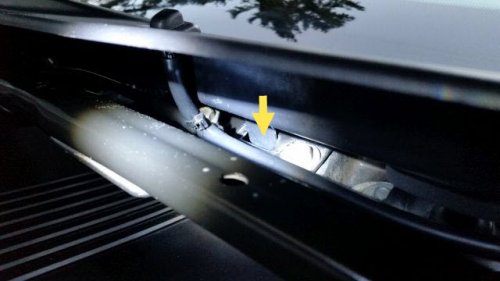
Align the foam seal with the rubber shaft boot BEFORE snapping entire cowl into place.

Watch the Washer tubing routing and ensure the Shaft to Cowl seal remains tight and in place.
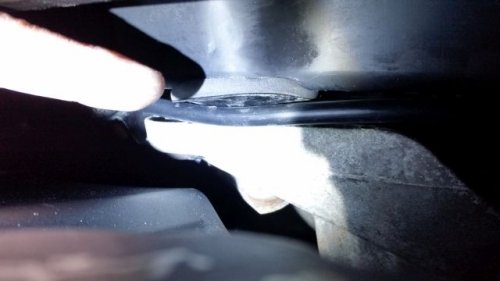
 DO NOT FORGET to push the cowls' rubber seal to glass in place. Work center outwards.
16) Reinstall the Qty 9 x Cowl Push Type Retainer clips - OEM p/n W705956-S300
17) Reattach and Test the Washer Fluid Sprayer and confirm functionality. Check for leaks.
~ if content with aforementioned repairs,
18) Re-position both Wiper Arms so while in their rest position they make perfect contact with the glass defrost line.
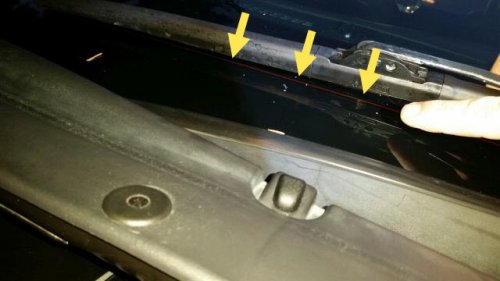
19) Affix both Wiper Arm retaining nuts. Light coating of anti seize works wonders. Don't overtorque !!!
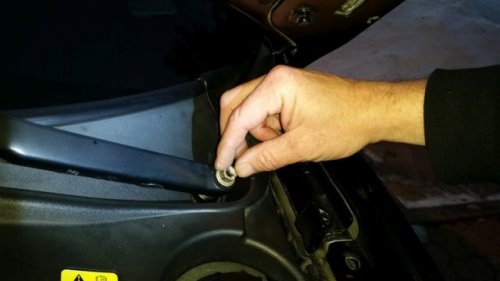
20) Replace the protective decorative rubber nut caps to both wiper arms.
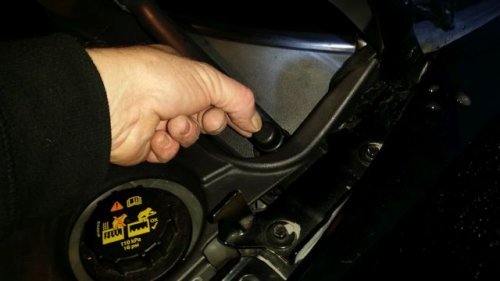
You just saved yourself $320+ in shop labor charges.


Direct Cause: Faulty worn out Passenger Wiper Arm Shaft to Cowl Seal.
Correction: Replace Foam Seal with OEM p/n 5W4Z-54021A46-A

Symptoms: Weak Washer Fluid Spray, potentially leaking onto/near Coil covers, causing Ignition misfiring.
Direct Cause: Faulty worn out, deteriorated, cracked Washer tubing fittings.
Correction: Replace Windshield Washer Spray tubing, Elbow and Tee fittings

Removal and Re-install aka: Re&RE
1) Begin by removing the protective decorative rubber nut caps from both wiper arms.

2) Undo the 13mm Wiper Arm shaft retaining nut.

3) Gently fist bang downwards onto the Wiper Arm assembly to nudge it loose from it's shaft.

4) Push down onto the Wiper Arm assembly to level it while removing it upwards from the shaft. Remove both Wiper Arms.

5) Gently undo all Cowl Push Type Retainer clips by pushing down into the center before pulling them up.

Don't forget the ones at either sides of the cowl.

Qty 9 x Cowl Push Type Retainer clips - OEM p/n W705956-S300

6) From the Passenger side, disconnect the main Washer Spray feed tubing at the elbow under the cowl.

7) Remove the plastic Cowl by firmly and evenly pulling upwards ensuring the sides come with it as a whole.

8) Inspect all seven cowl retainer clips, if any damaged or missing, they will need to be replaced.


The eighth post serves as a guide, not a lock-in retainer clip like the others, it's located directly beside the passenger side Wiper Arm Shaft opening.

9) Those posts with the retainer clips on the underneath side of the cowl will need to fit directly back into their respective slots at the bottom glass rail.


10) Wipe clean the rubber Wiper Arm shaft boot, if it's damaged or torn, an entire wiper arm assembly must be purchased.

11) This is the Passenger Wiper Arm Shaft Foam Seal to be replaced - OEM p/n 5W4Z-54021A46-A


12) Begin to removed the old defective foam seal by means of cutting and or pulling it off.


13) Affix the new replacement foam seal directly around the raised centered ring. Ensure an even dry clean surface!

14) If leaking issues with the windshield washer system, simply replace by means of rebuild, blow out the nozzles.


Locally obtained, Dayco 80623 Connector 3/16" Elbow & Dayco 80633 Connector 3/16 Tee
15) Reinstall the cowl with the new foam seal. Alignment is key.

Guide post must align through correctly, evenly without obstruction.
Focus on middle install first then work outwards, OBSERVE both ends aim underneath rubber corner boots.

Align the foam seal with the rubber shaft boot BEFORE snapping entire cowl into place.

Watch the Washer tubing routing and ensure the Shaft to Cowl seal remains tight and in place.

16) Reinstall the Qty 9 x Cowl Push Type Retainer clips - OEM p/n W705956-S300
17) Reattach and Test the Washer Fluid Sprayer and confirm functionality. Check for leaks.
~ if content with aforementioned repairs,
18) Re-position both Wiper Arms so while in their rest position they make perfect contact with the glass defrost line.

19) Affix both Wiper Arm retaining nuts. Light coating of anti seize works wonders. Don't overtorque !!!

20) Replace the protective decorative rubber nut caps to both wiper arms.

You just saved yourself $320+ in shop labor charges.
Last edited by a moderator:
