
With 96K on my 97, I have been thinking about a minor issue it has for a while now and thought it was time to make it better one way or another. The issue starts as a very common problem that all these Gen 2's have as far as my investigating goes. The cooling fans are 2 wire fans but have a 2 speed operation. The original problem is the ECM slow speed operation has a tendency to burn out defaulting to only the high speed output of the ECM. To complicate matters, the fan turn on sensor is tied to the AC pump pressure so to have correct fan cycling, your AC line pressure needs to be in a functioning parameter. Also the fans only run when the vehicle is under 47 mph. Any way, my issue was that with your foot on the break, and in drive, when the fan turns on, the load on the electrical system would drop the rpms to about 500 and the engine at that speed is on the verge of stalling. It in fact has stalled about 4 times in the past couple years. Add to that the AC clutch and the car struggles to stay running with the voltage dropping into the 12v area.Driving down the road, you would never see any issue. So, it was time to test the fan function and see if a new fan would draw less wattage. These fan motors have 3 mounting flanges so I opted to buy a new one that shows 3 screws holding the motor to the fan housing. Engine Radiator Cooling Fan Assembly For 2005 2006 2007-2014 Ford Mustang | eBay The closest fan assembly that matches the MKVIII is a 2005-14 Mustang 4.6L unit. Incidentally, mounting one as is would require cutting off about 3 inches of the right side of the shroud. I opted to just sawp the fan unit into the MKVIII fan shroud.
The OEM fan had a running wattage of about 240 watts while the new fan ran at only 140 watts. This was one key factor pointing me in the right direction. The OEM also had a very slight squeaking along with a very slight drag when letting it spin down from a hand spin. Another thing that I geared up to do is replace the alternator, and a Gates belt kit. Apparently, these high mounted alternators are subject to high heat up there under the hood so some diodes could very well be burned out lowering the units output slightly. Besides, with the fan assembly out, its a piece of cake to swap in a new belt, tensioner and idler.
The OEM fan motor has 3 heavy rivets holding the motor to the shroud. I used an air cut off wheel to just grind the exposed rivet head off and punch out the rivets. With the motor off, I also used the cut off wheel to get the plastic 3 wire connector out of the motor so I could eliminate the center tab and solder it to the new fan wires.
The new motor has 3 mounting tabs that are threaded with M5 x 8 screws. I didnt mod the screw tabs at all since they fell into a good place on the shroud mounting rim as is.
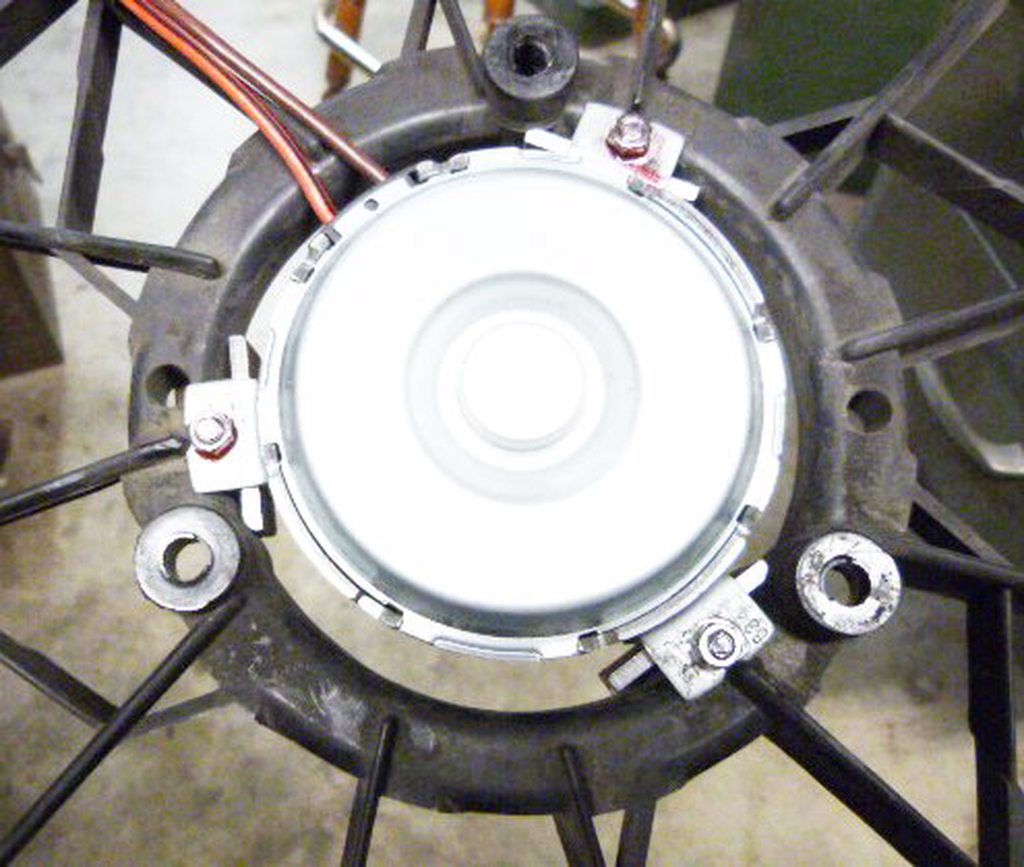
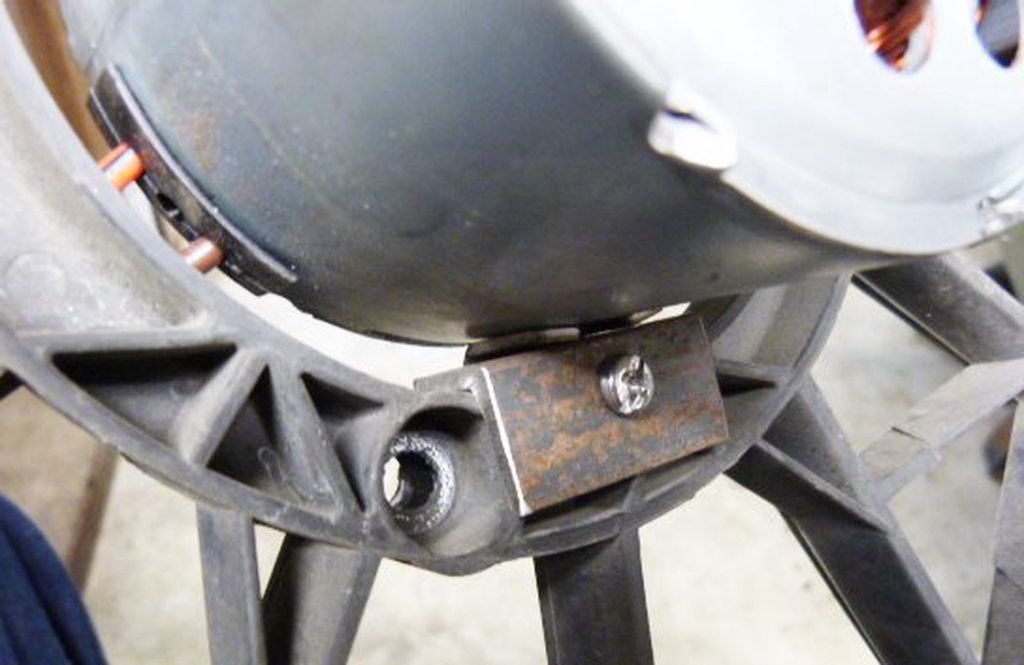
I used longer 1" M5 x 8 screws and added a nut to make sure they would stay locked in place with red lock tight all so. I also had to make up 3 mounting grab plates out of 3/4 x 3/4 x 1/8th" angle iron steel. You can see the bottom edge of the angle iron in the top pic. That one edge was shortened slightly so the angle iron would have a "clamping" action on the plastic mounting rim.
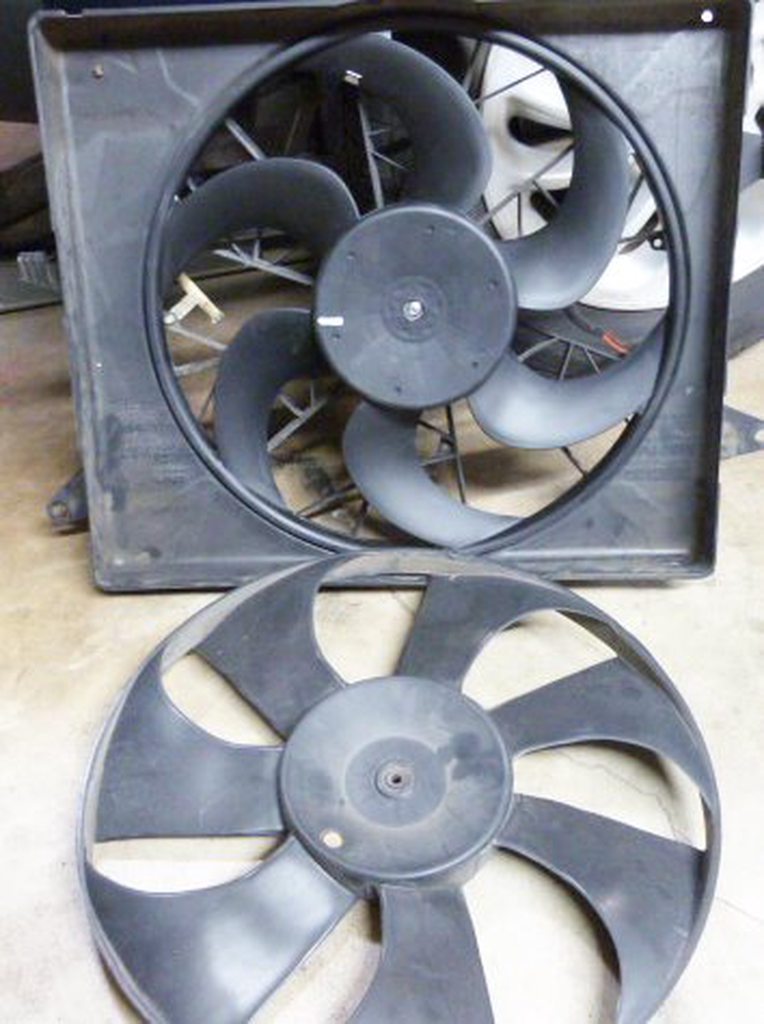
Here is the completed new fan in the old shroud with the old wide blade fan in front. Note that the little nut that holds the new fan on its motor shaft is a left hand threaded nut.
The OEM motor connector is marked + and - so its a no brainer. As you can see I ground away the center dead jumper post.

The OEM fan had a running wattage of about 240 watts while the new fan ran at only 140 watts. This was one key factor pointing me in the right direction. The OEM also had a very slight squeaking along with a very slight drag when letting it spin down from a hand spin. Another thing that I geared up to do is replace the alternator, and a Gates belt kit. Apparently, these high mounted alternators are subject to high heat up there under the hood so some diodes could very well be burned out lowering the units output slightly. Besides, with the fan assembly out, its a piece of cake to swap in a new belt, tensioner and idler.
The OEM fan motor has 3 heavy rivets holding the motor to the shroud. I used an air cut off wheel to just grind the exposed rivet head off and punch out the rivets. With the motor off, I also used the cut off wheel to get the plastic 3 wire connector out of the motor so I could eliminate the center tab and solder it to the new fan wires.
The new motor has 3 mounting tabs that are threaded with M5 x 8 screws. I didnt mod the screw tabs at all since they fell into a good place on the shroud mounting rim as is.
I used longer 1" M5 x 8 screws and added a nut to make sure they would stay locked in place with red lock tight all so. I also had to make up 3 mounting grab plates out of 3/4 x 3/4 x 1/8th" angle iron steel. You can see the bottom edge of the angle iron in the top pic. That one edge was shortened slightly so the angle iron would have a "clamping" action on the plastic mounting rim.
Here is the completed new fan in the old shroud with the old wide blade fan in front. Note that the little nut that holds the new fan on its motor shaft is a left hand threaded nut.
The OEM motor connector is marked + and - so its a no brainer. As you can see I ground away the center dead jumper post.