
This 1157 mod is a mod that would need a Lathe application. I started out with a 2005 Mustang 6 - 1157 socket sequential harness with 2 marker spade sockets that I bought off Ebay. Then after more reading found one guy on you tube that did a nice looking conversion to sequential but latter he claimed he had to get rid of them due to burning out parts of the lighting circuit despite his use of LEDs. So, I put the twist in markers on either side of the trunk key lock and the next 1157 ones out are marker and brake only as in the OEM function and the out side edge 1157s still run off the ballast wires except for the HI light is run directly off the Orange/blue signal wire of the OEM signal light sockets. Incidentally, do not use the orange/blue in the harness leading to the left rear tail light harness connector. That is not the Flasher wire. The orange /blue in the socket harness is the correct flasher wire on both left and right socket harnesses. All of the 6 new sockets run RED LEDs with a total draw of 8.6 watts on high. The Signal wire only gets an additional .8 of a watt to the signal draw to flash the trunk LED. The single OEM 1157 incandescent draws 28 to 35 watts fully illuminated. To start the process, you need a 1 & 3/8ths hole saw. Tape off the back of the housing with wide tap. Use a drawing compass to make a line about 2 inches off the top curvature of the black plastic top plastic edge onto the masking tape. I measured out equal distances and drilled the 1 and 3/8ths holes after a center hole was drilled as centering hole. The spade sockets are easy enough to drill out and then dremil out the locking tab slots on either side of the hole. To ensure you don't end up hitting the red lens with your drill when it brakes threw the black plastic as it WILL grab and shoot into the red lens, use a short piece of plastic tubing or pipe over the drill bit that will only let the tip of the drill threw the black plastic, limiting the drills depth once it drills threw. Trust me on this or you will be sorry with a cracked red lense housing! Then trim the spade socket lock tabs back for the thicker plastic housing so they will twist over the plastic and lock tightly in place as a weather tight seal.

The 1157 sockets need a 1" hole to fit into so I bought 4 sch 40 1" unions at Lowes. They have a internal rib that needs to be cut out on a lathe and the nut end will be turned to snug fit the 1 3/8ths holes drilled in the housing. They are also shortened to 1" in length as pictured. I belt sanded the locking lug tabs off the 1157 sockets so they drop into the 1" ID unions. The PVC unions get PVC glued into the black ABS holes. Its important to make sure the unions are lathe turned to a "sung" fit in the black plastic holes so the PVC glue will weld the two plastics together rock solid. Notice I left about 1/8th of the nut edges on the lathe turned end to act as a stop so you don't push the union too far into the housing hole. Twist them back & forth a few times in the wet glue and they will never come off or loose weather tightness. The unions are then drilled at the top edge for 1/4 x 28 set screws that will need rubber cement in their threads once ready to tighten down on the gasketed bulb sockets.
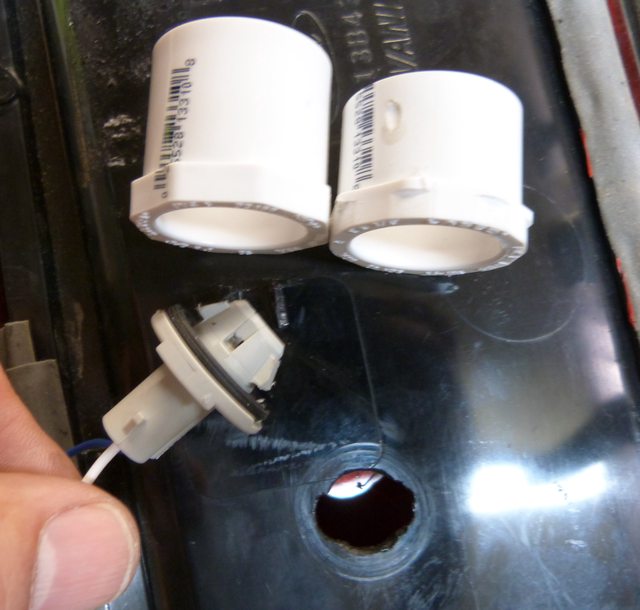
Modifyed Unions glued in place
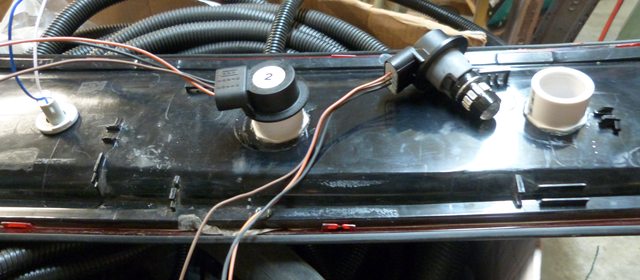
Socket pushed in tight on its gasket and set screw sealed and snugged. As finished!

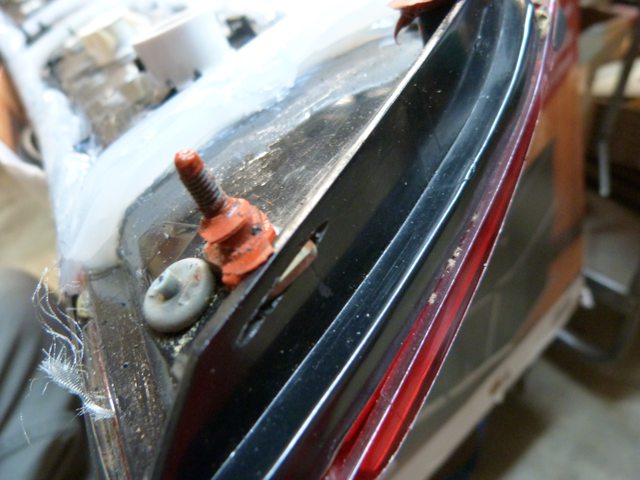
To fix the broken screw studs, I ground their plastic seat nearly completely away, leaving only two raised black plastic lines that are only about .100" high. Those are what kept the screw head from turning. I cut sections out of a 4" sch. 40 elbow I had, drilled them for the screw and ground them flat to mate with the black plastic of the screw base, counter sink the hole so it fits over the screw head and head retainer lines. Again, make sure the white PVC touches the black plastic all the way around the base, then PVC glue it. twist it around a few seconds and hold it tight until it hardens up.
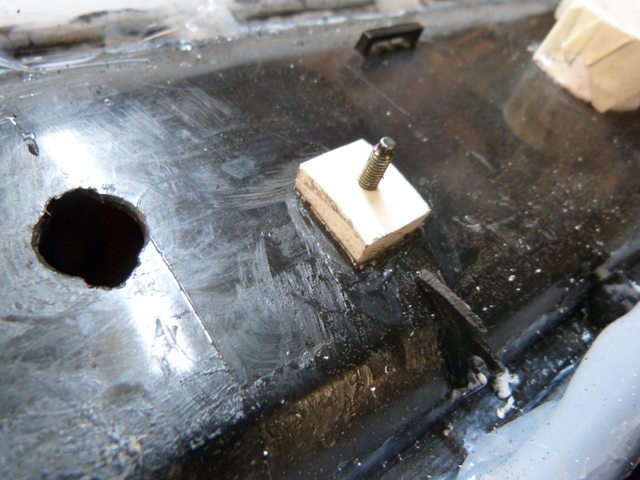
The next 2 screws that brake off are the upper end ones. For these, I weld a metal tab, extending one of the screw edges.

Using a air grinder small diam cut off wheel, put a slice in the black end rib. Be carful not to cut the slot wider than the width of your welded on tab or you run the risk of the tab turning right out of the slot when you try turning the nut onto the treads.
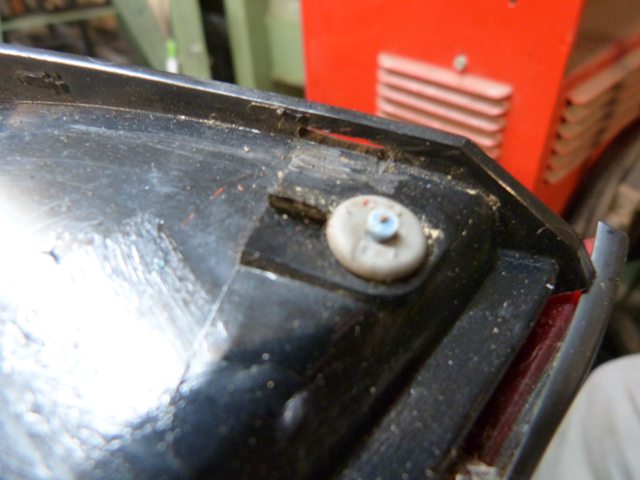
That's where the welded tab fits threw & use some rubber/silicon to set it in place on the trunk. My trunk light housing only had 3 good studs left after all the others broke off of the housing when I tried to loosen the nuts. The 4 repairs gives me a good 7 studs to draw down on the housing. Other wise, it would have been junk.
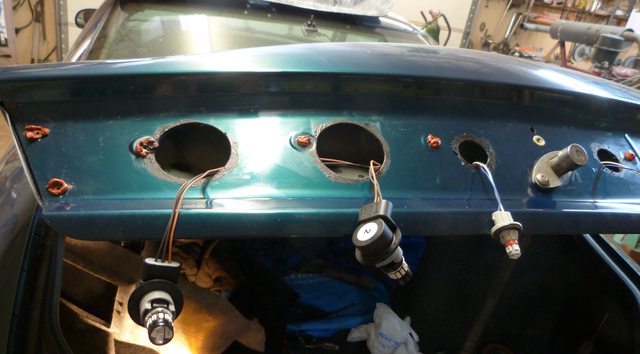
Now the next step is using a 3.5" bi metal hole saw to blow threw the first sheet metal of trunk to let the sockets sit beyond the trunk's outer surface. To mark just where your drill holes should be, I put a small bead of play dough on the mouth of each white bulb extension and carefuly set the housing over where the screw studs would go into their end holes. as the play dough presses into the trunk, pull away and they will stick to the trunk. Sharpy a center dot in the play dough ring. The bulb sockets need the holes a little off set to side where the wires go out of the socket so drill about 1/2" away from your center mark toward the key hole center of the housing. I used the smaller 1 3/8ths hole saw for the spade sockets after a few rough measurements pointed out their basic positions that are not as critical as the larger 1157 socket heads. The black you see around the holes is that Liquid Tape. It works pretty good to cover the sharp bare metal edges when you use a few coatings.
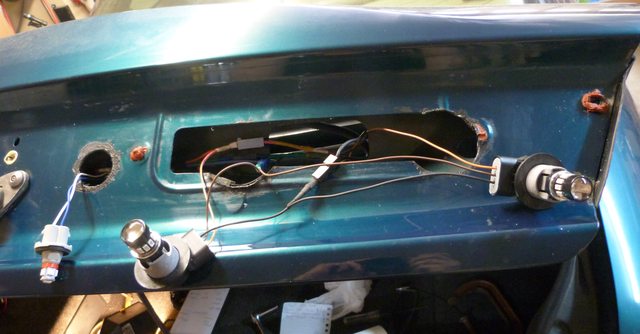
Dry run a housing fitting with the sockets in. I had to trim a bit of plastic off the bottom edge of the outside sockets because they were just touching the inner sheet metal. No biggy here. Once that's all done get 3 tubes of 100 % Silicone caulk that has a full cure in 24 hours. A full weather seal must be made as pictured so the trunk is sealed from the out side weather. A release agent must be used so the wet caulk will not stick to the sheet metal when you peal the housing off. I used Brownell arca glass bedding release agent. https://www.brownells.com/gunsmith-...aerosol-sku081028000-1045-3808.aspx?rrec=true
I first tried a heavy car waxing but that didn't work and had to do it over again. You will need to fill in areas that didn't touch the sheet metal so just fill in those areas until you have a nice soft gasket sealing the new holes from the outside. Also, the full gasket keeps the studs from damage of multiple trunk slamings. There is a lot of space to fill as you can see.

Once all is finally done, no more trunk light issues.....EVER!
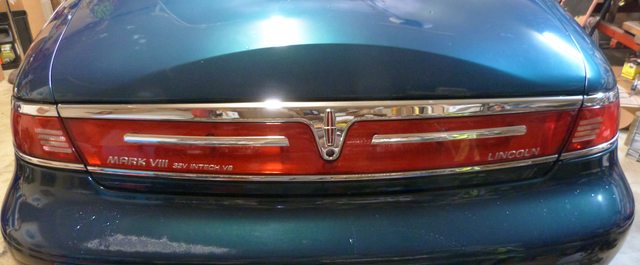
The LED's have a projector lens that's pretty bright and with the red plastic lens having no refraction surface, I put a chrome 3/4" stick on molding over the bulbs so there is no blinding laser type beam shooting out.
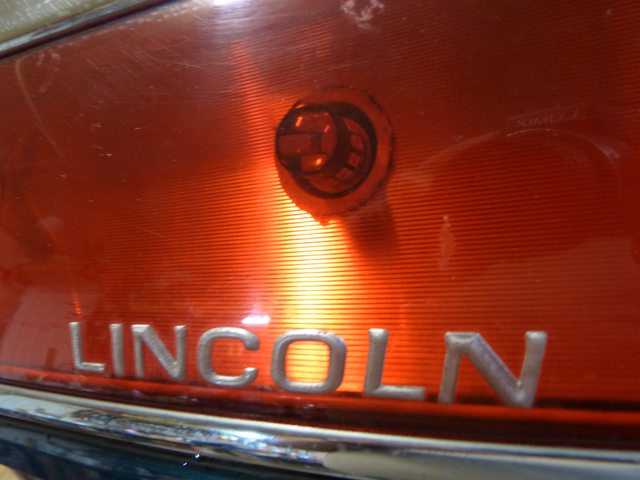
This night shot of the marker lights is not even close to the rich red color of the trunk light.
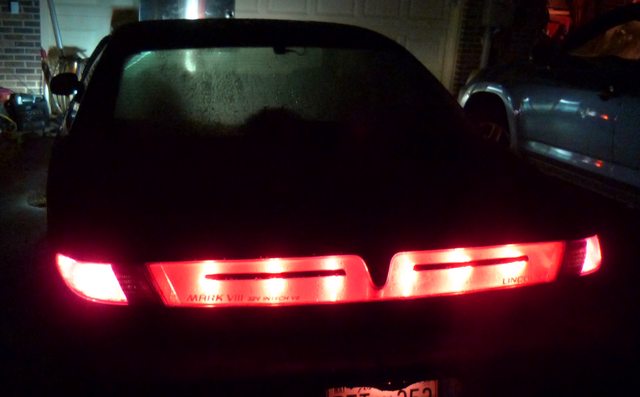
And oddly, the end LEDs have a split second faster response time to the OEM bulbs in the corners so the signal flash does in fact have a slight sequential movement! It was a lot of work for sure but I'm quite happy with the results. If anyone wants the exact RED LEDs I used, just respond here and I'll dig up the links.
The 1157 sockets need a 1" hole to fit into so I bought 4 sch 40 1" unions at Lowes. They have a internal rib that needs to be cut out on a lathe and the nut end will be turned to snug fit the 1 3/8ths holes drilled in the housing. They are also shortened to 1" in length as pictured. I belt sanded the locking lug tabs off the 1157 sockets so they drop into the 1" ID unions. The PVC unions get PVC glued into the black ABS holes. Its important to make sure the unions are lathe turned to a "sung" fit in the black plastic holes so the PVC glue will weld the two plastics together rock solid. Notice I left about 1/8th of the nut edges on the lathe turned end to act as a stop so you don't push the union too far into the housing hole. Twist them back & forth a few times in the wet glue and they will never come off or loose weather tightness. The unions are then drilled at the top edge for 1/4 x 28 set screws that will need rubber cement in their threads once ready to tighten down on the gasketed bulb sockets.
Modifyed Unions glued in place
Socket pushed in tight on its gasket and set screw sealed and snugged. As finished!
To fix the broken screw studs, I ground their plastic seat nearly completely away, leaving only two raised black plastic lines that are only about .100" high. Those are what kept the screw head from turning. I cut sections out of a 4" sch. 40 elbow I had, drilled them for the screw and ground them flat to mate with the black plastic of the screw base, counter sink the hole so it fits over the screw head and head retainer lines. Again, make sure the white PVC touches the black plastic all the way around the base, then PVC glue it. twist it around a few seconds and hold it tight until it hardens up.
The next 2 screws that brake off are the upper end ones. For these, I weld a metal tab, extending one of the screw edges.
Using a air grinder small diam cut off wheel, put a slice in the black end rib. Be carful not to cut the slot wider than the width of your welded on tab or you run the risk of the tab turning right out of the slot when you try turning the nut onto the treads.
That's where the welded tab fits threw & use some rubber/silicon to set it in place on the trunk. My trunk light housing only had 3 good studs left after all the others broke off of the housing when I tried to loosen the nuts. The 4 repairs gives me a good 7 studs to draw down on the housing. Other wise, it would have been junk.
Now the next step is using a 3.5" bi metal hole saw to blow threw the first sheet metal of trunk to let the sockets sit beyond the trunk's outer surface. To mark just where your drill holes should be, I put a small bead of play dough on the mouth of each white bulb extension and carefuly set the housing over where the screw studs would go into their end holes. as the play dough presses into the trunk, pull away and they will stick to the trunk. Sharpy a center dot in the play dough ring. The bulb sockets need the holes a little off set to side where the wires go out of the socket so drill about 1/2" away from your center mark toward the key hole center of the housing. I used the smaller 1 3/8ths hole saw for the spade sockets after a few rough measurements pointed out their basic positions that are not as critical as the larger 1157 socket heads. The black you see around the holes is that Liquid Tape. It works pretty good to cover the sharp bare metal edges when you use a few coatings.
Dry run a housing fitting with the sockets in. I had to trim a bit of plastic off the bottom edge of the outside sockets because they were just touching the inner sheet metal. No biggy here. Once that's all done get 3 tubes of 100 % Silicone caulk that has a full cure in 24 hours. A full weather seal must be made as pictured so the trunk is sealed from the out side weather. A release agent must be used so the wet caulk will not stick to the sheet metal when you peal the housing off. I used Brownell arca glass bedding release agent. https://www.brownells.com/gunsmith-...aerosol-sku081028000-1045-3808.aspx?rrec=true
I first tried a heavy car waxing but that didn't work and had to do it over again. You will need to fill in areas that didn't touch the sheet metal so just fill in those areas until you have a nice soft gasket sealing the new holes from the outside. Also, the full gasket keeps the studs from damage of multiple trunk slamings. There is a lot of space to fill as you can see.
Once all is finally done, no more trunk light issues.....EVER!
The LED's have a projector lens that's pretty bright and with the red plastic lens having no refraction surface, I put a chrome 3/4" stick on molding over the bulbs so there is no blinding laser type beam shooting out.
This night shot of the marker lights is not even close to the rich red color of the trunk light.
And oddly, the end LEDs have a split second faster response time to the OEM bulbs in the corners so the signal flash does in fact have a slight sequential movement! It was a lot of work for sure but I'm quite happy with the results. If anyone wants the exact RED LEDs I used, just respond here and I'll dig up the links.