
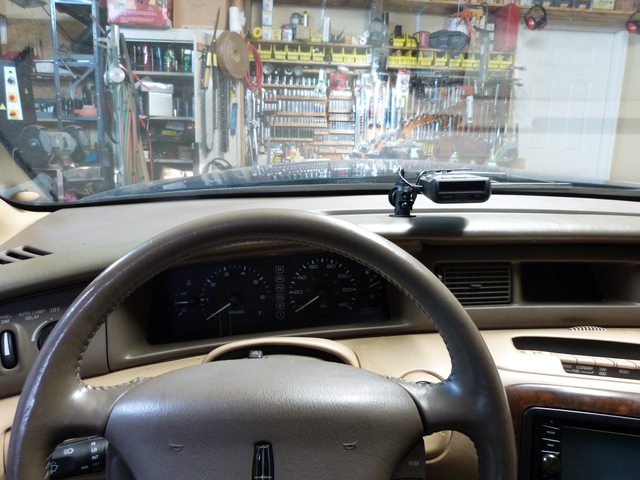
This is for the fabricators out there that can handle a little welding, drilling and wiring. The design of the Mark VIII dash board is about as perfect a design as can be for this modification. If you absolutely hate suction cups and spring cords, this might be for you! I'm all about Quick detachable accessories and that is at the heart of this project. The end product looks like this;
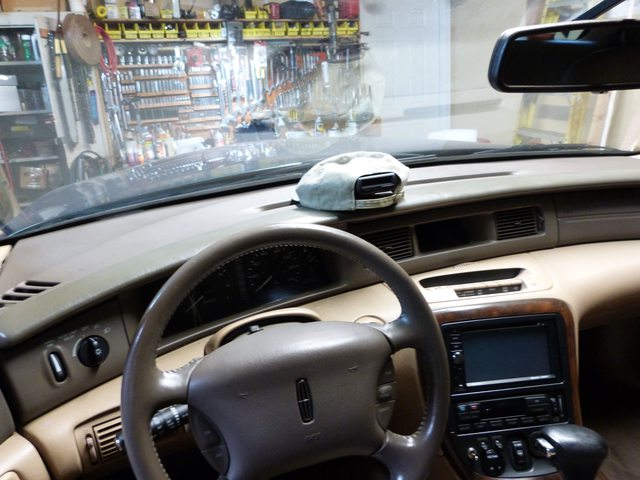
and this;
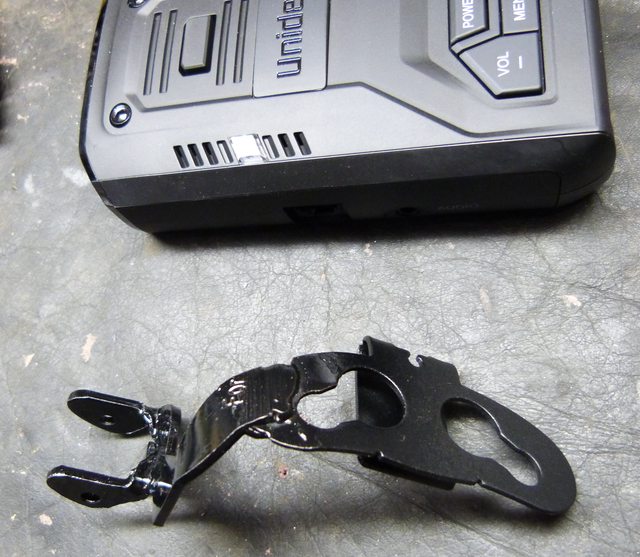
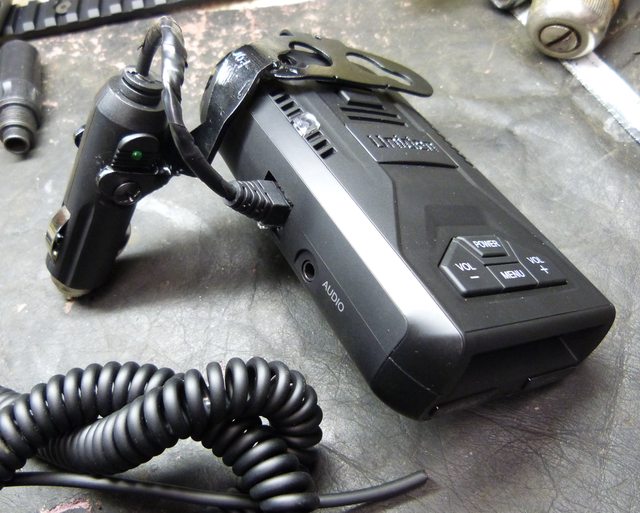
The 12v socket is a marine type that has better holding ability than standard sockets. The Radar unit I have purchased for the project is a Uniden R1. The reviews are top notch and it physically fits in with how I wanted it mounted. The unit has a snap in snap out top bracket for suction cups but what I did was made a metal mount for the 12v male plug and welded it to the suction cup bracket like this;
The assembled unit is a simple fixed plug in design with the springy cord cut away to a short direct plug in. The cord is a simple 2 wire power cord with a standard fuse inside the male end.
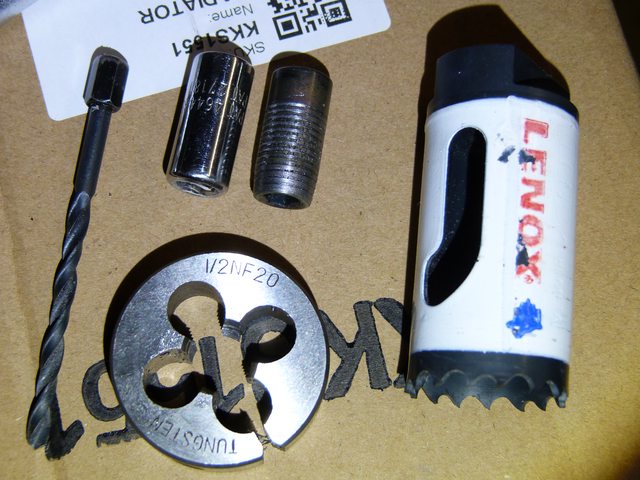
The tools I used to bore the dash hole is a 1 1/8th hole saw bought from Lowes. I also bought their air ratchet that is a 1/4" drive. I made an adapter out of a 1/4" drive X hex drive socket. The picture shows an unmodified socket on the left and the mod-ed one on the right. To mod it, I heated it up until the sockets turns orange with a MAP gas burner can. then slowly pull the flam away from the socket over a few minutes so the hot socket cools slowly. This will make it soft. The OD of the socket is just right to turn a 1/2 NF X 20 TPI Die on its hex end. Those are the threads you need to screw the socket into the hole saw. This makes the hole saw short enough for the air wrench to easily fit between the dash and wind shield.
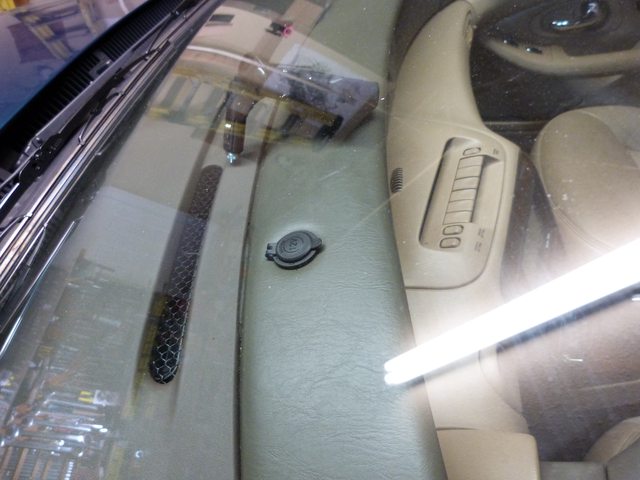
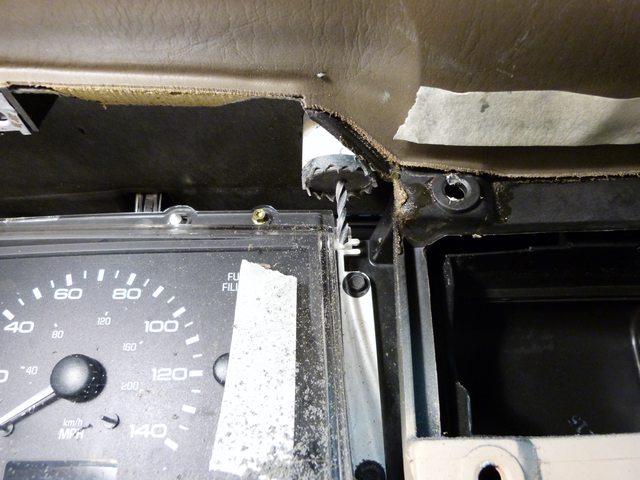
The hole should be centered exactly 1 3/4" back from the seam as pictured here;
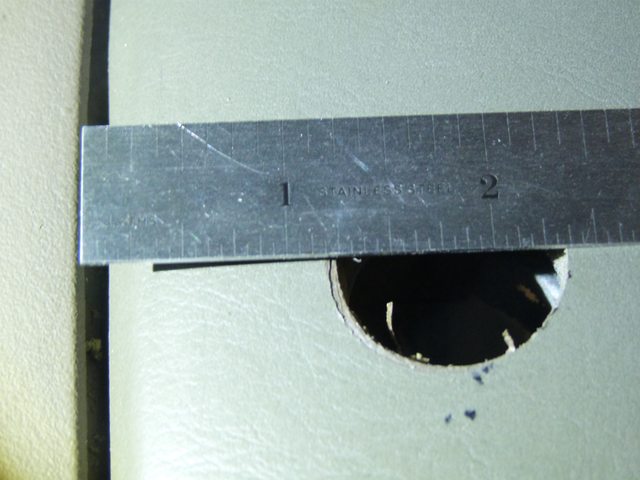
To locate the left to right position, you must first put a strip of masking tape on the gauge window where the clear window meets the gauge dash face panel. Once you remove the panel, the tape will be the left most area of the hole above as pictured.
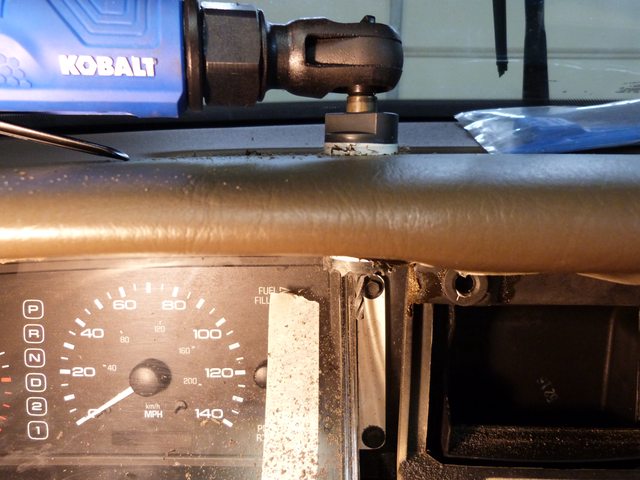
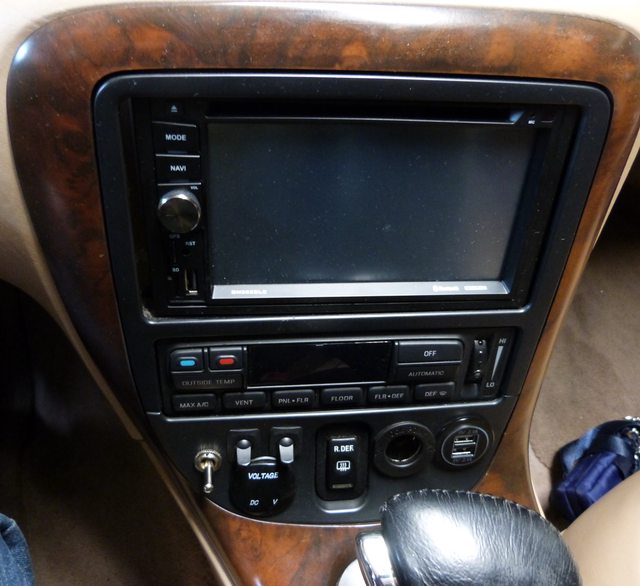
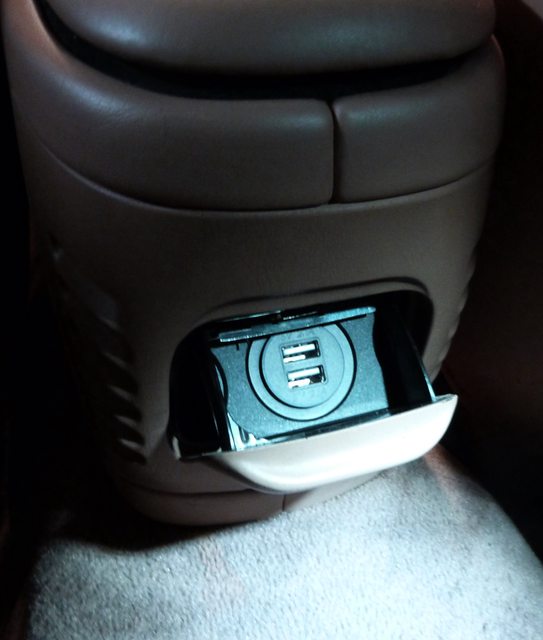
Once the hole is drilled, its just a simple press in the socket, tighten it in with its plastic nut and run your wires from it directly down into the radio cavity. I deleted the center console 12v socket and put that power wire to the pictured silver toggle switch. That switch powers up both the dash and front console 12v socket as pictured. The small black toggles are to turn on the rear view cam at will in addition to its normal reverse function and the other grounds out the DVD player "brake" wire so I can play the DVD without the need of a emergency brake engagement. Below the toggles is a 12v LED indicator. I ordered it and the USB outlets in blue illumination. And I couldn't leave out the rear ash tray upgrade with the same blue lighted USB's ..... I'm starting to get real comfortable in my Mark!")
and this;
The 12v socket is a marine type that has better holding ability than standard sockets. The Radar unit I have purchased for the project is a Uniden R1. The reviews are top notch and it physically fits in with how I wanted it mounted. The unit has a snap in snap out top bracket for suction cups but what I did was made a metal mount for the 12v male plug and welded it to the suction cup bracket like this;
The assembled unit is a simple fixed plug in design with the springy cord cut away to a short direct plug in. The cord is a simple 2 wire power cord with a standard fuse inside the male end.
The tools I used to bore the dash hole is a 1 1/8th hole saw bought from Lowes. I also bought their air ratchet that is a 1/4" drive. I made an adapter out of a 1/4" drive X hex drive socket. The picture shows an unmodified socket on the left and the mod-ed one on the right. To mod it, I heated it up until the sockets turns orange with a MAP gas burner can. then slowly pull the flam away from the socket over a few minutes so the hot socket cools slowly. This will make it soft. The OD of the socket is just right to turn a 1/2 NF X 20 TPI Die on its hex end. Those are the threads you need to screw the socket into the hole saw. This makes the hole saw short enough for the air wrench to easily fit between the dash and wind shield.
The hole should be centered exactly 1 3/4" back from the seam as pictured here;
To locate the left to right position, you must first put a strip of masking tape on the gauge window where the clear window meets the gauge dash face panel. Once you remove the panel, the tape will be the left most area of the hole above as pictured.
Once the hole is drilled, its just a simple press in the socket, tighten it in with its plastic nut and run your wires from it directly down into the radio cavity. I deleted the center console 12v socket and put that power wire to the pictured silver toggle switch. That switch powers up both the dash and front console 12v socket as pictured. The small black toggles are to turn on the rear view cam at will in addition to its normal reverse function and the other grounds out the DVD player "brake" wire so I can play the DVD without the need of a emergency brake engagement. Below the toggles is a 12v LED indicator. I ordered it and the USB outlets in blue illumination. And I couldn't leave out the rear ash tray upgrade with the same blue lighted USB's ..... I'm starting to get real comfortable in my Mark!