

By: Speedy_2
Ok, here's my "How To" on installing the "Nitrous Express "Incognito" Hidden Dry System"(NX# 60000) and give your 1998 Cadillac STS Performance Power
Here's the kit
(Click on photos to enlarge them)
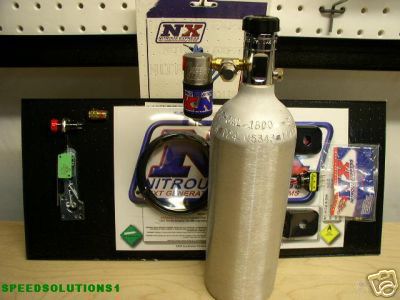
System comes with:
# 1.4 lb. bottle
# solenoid
# fill fitting
# polyline
# jets (biggest is around 50 HP) (I personally could only feel an increase of about 25HP. Addition jets are available)
# arm switch
# throttle switch
# pushbutton
Tools Needed: (what I used)
- Basic hand tools:
- Screwdrivers (standard & phillips)
- Wrenches(various for fittings included in the kit &
- any you will need to buy)
- 12 Volt test light
- Crimping Tool/Wire Stripper
- Coat Hanger(used to feed wire and hose to the truck)
- Small Knife or other sharp object
Extra parts I needed:
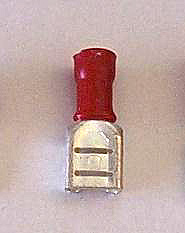
At least "5" Wire connectors to connect wire to the switches.
Something like this.
- 18 Gauge wire.
- Additional 16 feet of 1/8" vacuum hose.(Kit only includes about 10' which was no where near enough)
- 1/8" Brass Compression Fitting
- Bottle Mount: This kit does not come with a bottle mount. I went to Home Depot and bought a Fire
- Extiguisher mount. You can mount it any way you like. Depends on where you want to mount it.
store.
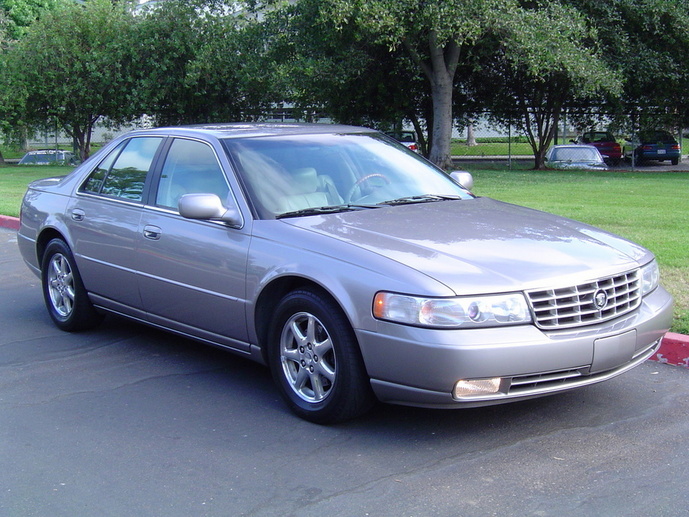
Ok, here's the car we'll be working with. 1998 Cadillac Seville STS. I'm sure other year models and maybe even the Cadillac DeVille are pretty close to the same when installing this.
Ok, I don't really think there is any set order to do this in but they recomment the bottle first. Find a location where it fits and won't be messed with during driving. Also, keep it away from heat. I chose the small compartment in the truck. It fits perfect here.
HOWEVER - this is only a good location if you keep bottle in the car only at the track.
In this location it could be very dangerous if you were hit in the rear by another car.
I do NOT recommend driving on the streets with the bottle installed in this location.
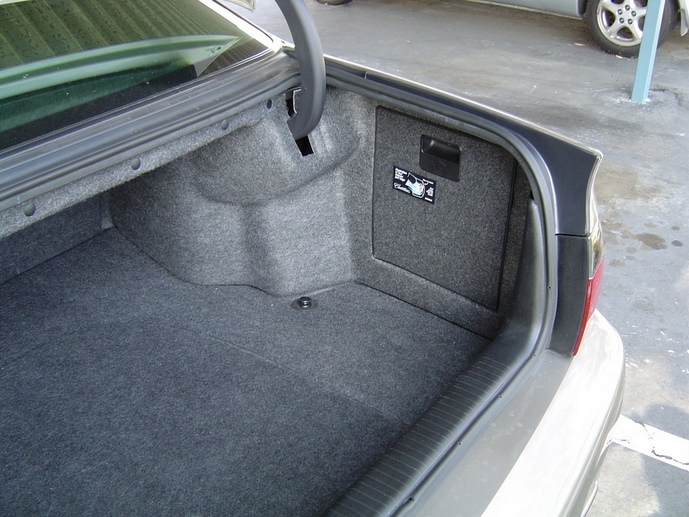
Here's how to mount the Bottle:
The screws that I used came with the extinguisher mount. I also purchased washers since I was mounting
it to the plastic and not any metal. The formed part of the box is strong enough since this bottle is very
small.
Punch small holes with a knife to get the screws
through. Then, put the washers and nuts on. Pretty
simple.

Once you have that done you can move on to routing hose and wires. Well come back to the mounting later.
Find Power:
With all the wires in a Cadillac it can get pretty confusing to find the right one. Just use your test
light to find a wire that only comes on when the key is turned "on".
I accidentally chose this Purple wire. Which is actually a good thing. It's the Cruise control
shutoff. It cuts power when you apply the brake. So, this is even safer. If you hit the brake it will shut
down the nitrous system. Even though I didn't know I was doing it, I would recommend it.
First remove this panel and you'll see all the wires hang down.

Splice your wire and make sure you leave enough extra for the arming switch. I attached the switch to the
black panel above so my wire wasn't very long.

Here's the arming switch. Your power will run here first. So connect it using a wire connector. Also,
connect another to a ground and connect to the switch.
Finally you'll have one more attached going to WOT(Wide open Throttle) switch. Although you don't
need the WOT switch it is recommended so that you do not engage the Nitrous without being at WOT.
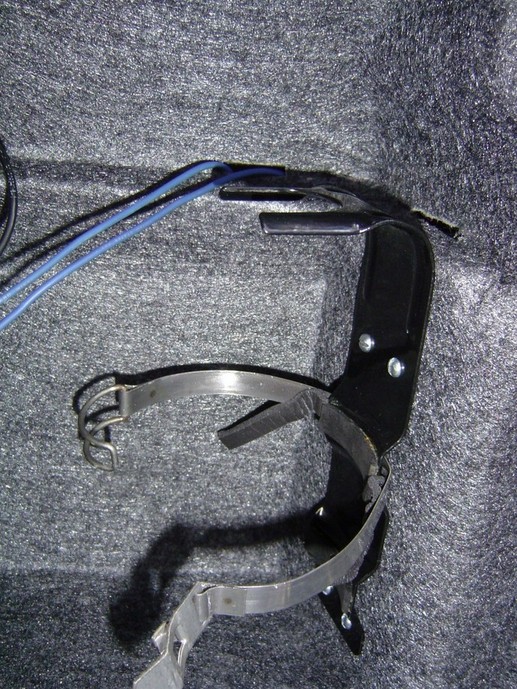
Here's how to mount the WOT switch, if you decide to use it.
I had to use a hose clamp to attach it to the pedal. You can also attach it to the fire wall, but on the
Caddy there is very thick insulation that I didn't want to cut out. It's also possible to mount this to
the Throttle body. The clamp was simple and I haven't had any problems with it. The switch arm is what
touches the floor board at WOT and turns the switch on. Make sure it works at WOT and not before. And of
course make sure it doesn't stay completely off. It's thin metal and it's eay to bend.
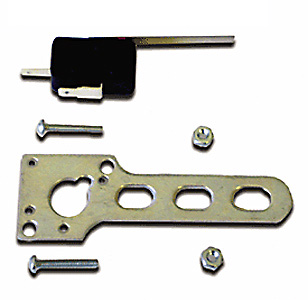
The Mounting plate, screws, and switch all come in the kit. Screw the switch to the plate and clamp it on. Hard to do since
there isn't much room under there.

WOT Switch
The wire coming from the switch will go to this WOT switch. Another wire will go from this switch to the
Nitrous solenoid. You can run the wire across the fire wall and come out
on the passenger side. Remove the 2 screws on the black panel to access the wires.

Now it's time to run the Nitrous hose. You can leave both black panels off since the hose will be following
the wire leading to the solenoid. Start under the hood and find the large group of wire leading into the
firewall on the driver's side. You'll seen some red tape right where it goes into the car. You can poke a
hole through the rubber and push the hose through.

Once through you can go back inside and find the hose.
You'll see the same red tape and you can then pull your hose through.

Make sure to leave enough hose to lead to your intake.
(Note: I had to purchase 16 feet of additional hose to reach to my trunk)
You can route the hose any way you like. This is how I did it

While your here you can cut your hole into the intake
tube and run the hose through. Make sure that the
hose is pointing in the direction of air flow. You'll
also want to seal any gaps with silicone.


Now run the hose along the firewall with the wire. You should now have the Hose and wire located on the
passenger side. Run the hose and wire under the moulding all the way to the back seat. You can connect
the additional hose using the 1/8" Brass Compression fitting.

Now you can zip tie any extra hose or wire here and piece together the hose since it's not long enough.
This next part can be tricky. You'll need the wire hangar or something similar to run the hose and wire
to the trunk. I took this picture to show where the hole is. Once you get through that hole, you have to
"feel" your way over the wheel well.

Once you get them through you can go to the trunk and
feel for the wire and hose behind the bottle mount
area. Once you do that, you can pull them through and
then replace your seat. As you can see in this pic,
the wire and hose just run through the exsisting
slots.

Now, connect the wire to one of the wires from the solenoid.
Connect the other to ground. (doesn't matter which, the solenoid is not polarity sensative)
Choose a jet and put it in the brass compression fitting. Screw it into the solenoid using nylon tape.
The fiitting is quick release. you can insert the hose at the green end and pull the green ring and the
hose will be locked in. Mount your bottle and you're good to go.

The only down side to this kit is refilling. You have to remove the brass fitting and the black part of the
solenoid to take the bottle out. I'm searching for another way to disconnect the bottle without all the
hassle. Until then you can get a threaded brass plug to put in the solenoid to refill the bottle.
I hope this helps everyone. And don't forget, only use at WOT. Do not use during a burnout!! I've heard
this can be bad for the motor. Other than that have fun!! 1998 Cadillac STS Performance!