
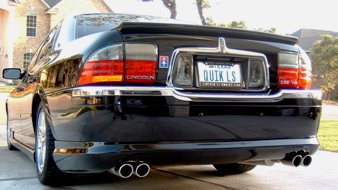
By: Quik LS
Excerpts from Taurus Club of America
I purchased :
- 12,000mcd RED LEDs off e-bay (100 LEDs for $18)
- 560ohm resisters from Radioshack
I then
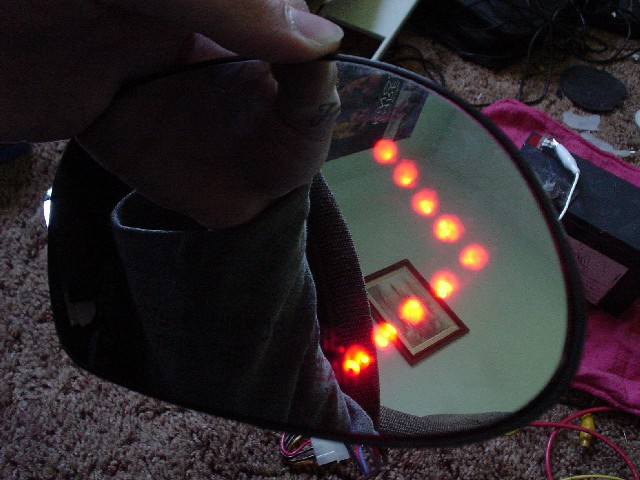
- soldered 9 LEDs in parallel into a V and attached a resistor to one leg
- covered them in glue to keep it water tight
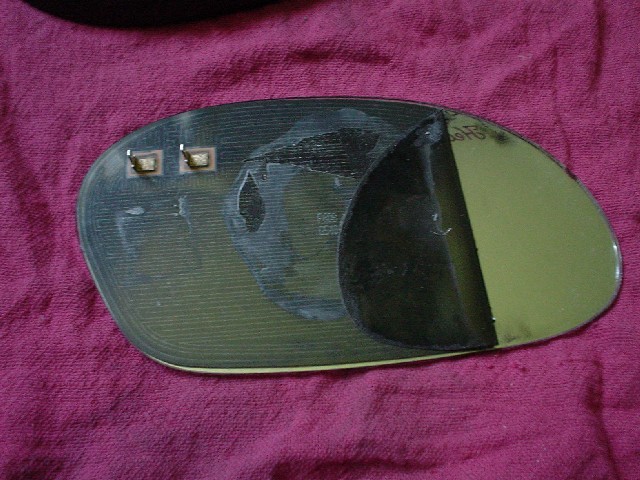
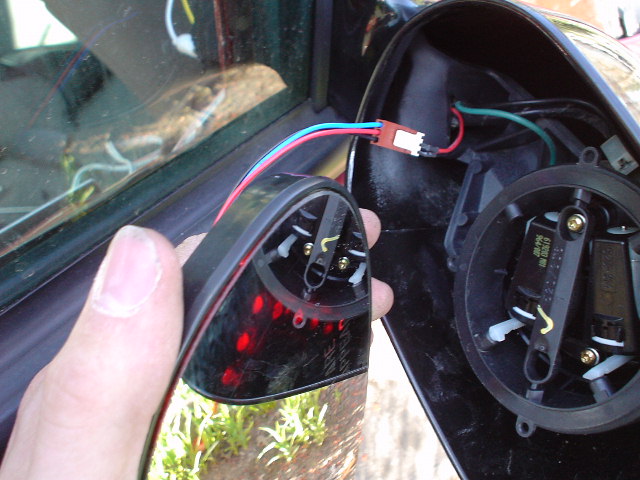
- pulled the mirror out of the housing
- pulled the mirror out of the plastic holder
- peeled the heater pad off the corner of the mirror (and cleaned the glue goop off the mirror)
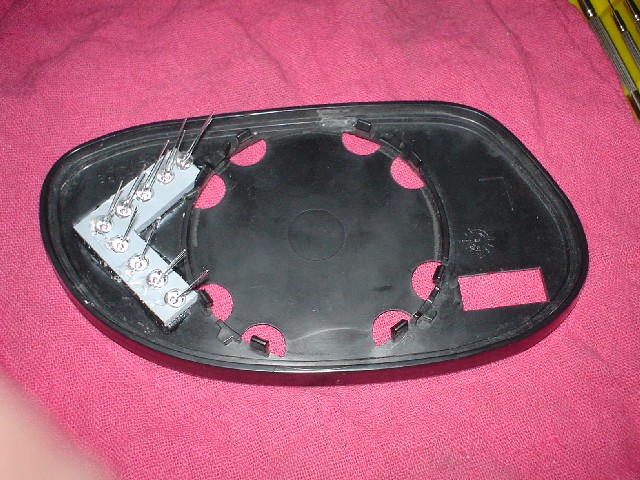
- cut enough of the plastic housing away to mount the LEDs
- filled the cavity with black silicon sealant (to keep it water tight)
- attached the LEDs to the turn signal wires (already in my mirror from my earlier project)
First Step
Remove mirror glass from motor mount by reaching underneath the glass and pull out. The mirror will "pop" out. It won’t break, so pull hard.
Then Heat the back of the mirror with a heat gun or hair dryer and GENTLY pry the glass from the plastic backing. There is two pieces of stick foam tape and some hot glue from the factory.
Next you will see the back of the mirror has a thin plastic backing which is the heater pad for the "heated mirror" option. Now heat the back of the mirror with a hair dryer and peal back the heater pad on the outside edge of the mirror, just enough so the leds can sho through the glass with out the backing covering them.
Second Step
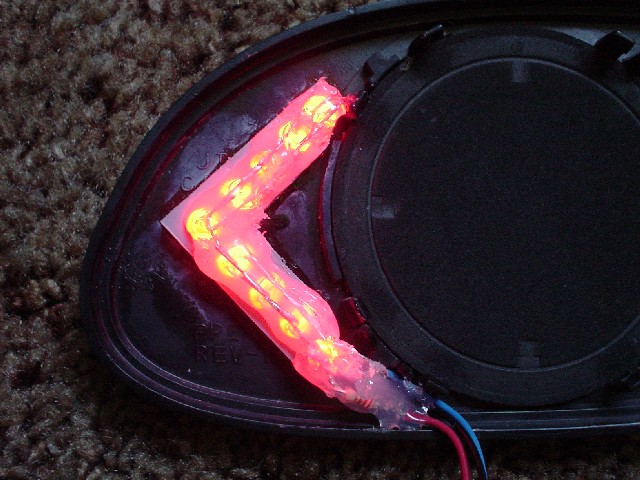
Create a 1/4" thick v-shaped piece of plastic the size you want the arrow to be and glue it to the back of the mirror plastic. The drill 5mm holes in the plastic. The catch is to drill them at an angle so the cars behind yours get a direct view of the leds (because leds are not very wide angle. I chose 10,000 mcd 30 deg. viewing angle red leds. Any less bright and it would not be an effective turn signal during the day.
The driver side mirror is drilled at a 12 deg. offset and the passenger side at a 20 deg. offset. A drill press is very useful for this task.
Then insert the leds into the holes you just drilled. and temp. hot glue them in place to make it easier to solder them.
Solder the leads together in parallel. You also need a resistor so you can hook it to the 12v turn signal in the car. You can search for an "led calculator" on goggle to figure out the following. For me, I needed a 100 ohm resister. The catch is I needed to dissipate at least 1/4 watt of electricity and all I had was 1/8 watt resistors, so I used 2 x 220 ohm resistors in parallel.
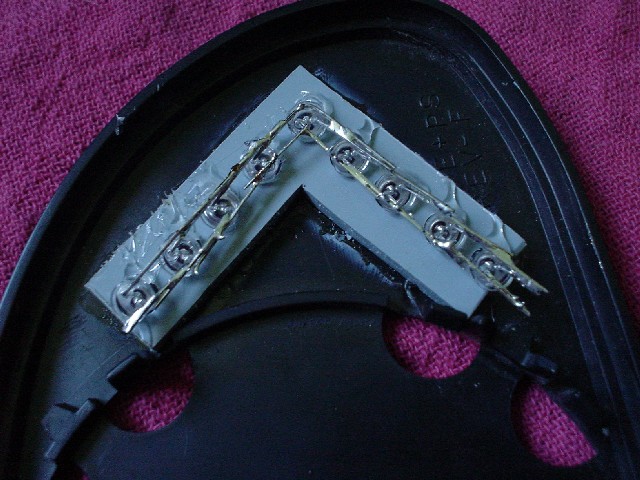
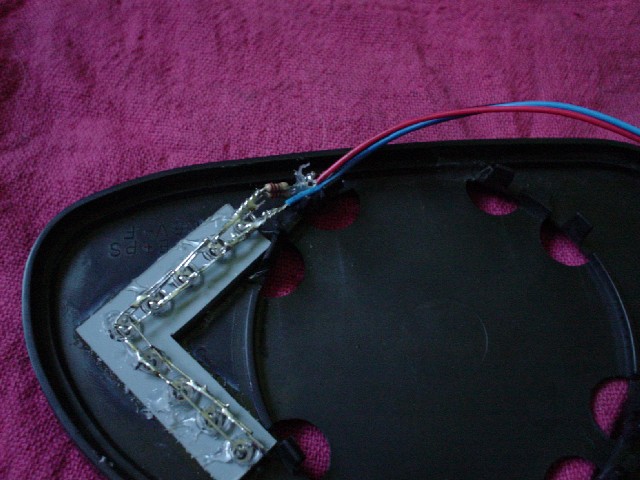
Then cover it in hot glue to protect it from the weather.
Third Step
Now re-attach the glass to the plastic backer by using foam sticky tape and some hot glue just like the factory used.
Remove your door panel as described in your Haynes manual. Then remove the mirror from the door. This is also described in the Haynes manual, but I go over it anyways.
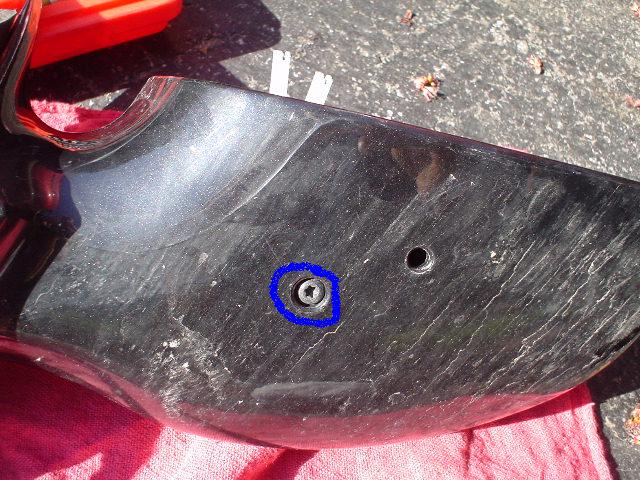
Remove the three bolts that hold it in place (one being behind the plastic weather seal).
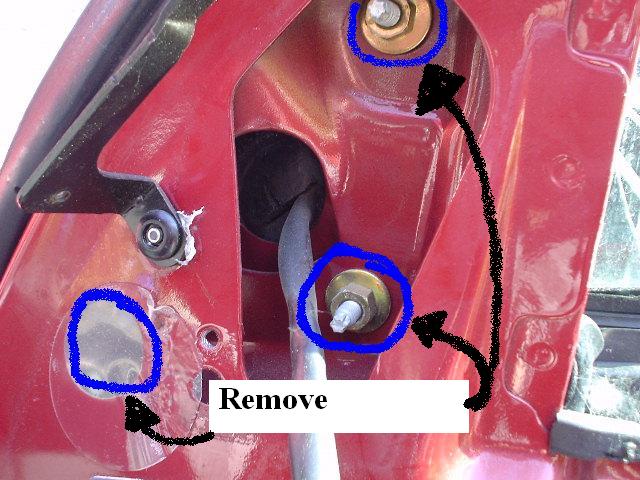
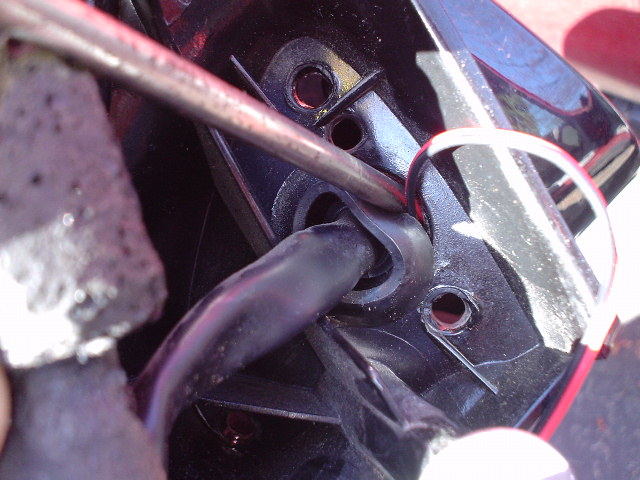
Pull up the seal on the mirror once it is removed and you will see the grommet ant 3 of the 4 screws that hold the motor mount inside the mirror casing. Remove the 3 screws with a star bit.
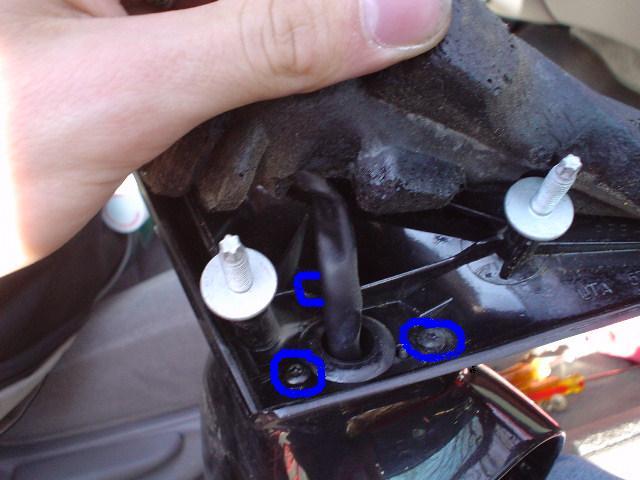
Then remove the last screw on the bottom of the mirror housing.
Fish your wire through the grommet,
And reattach your mirror
Step Four
Ground both the sets of leds to the car and attach each side to the appropriate turn signal wire.
These wires can be found in the drivers side kick panel. All you need to do is remove the trim, and attach the driver’s side to the green wire with orange stripe, and the passenger side to the orange wire with blue stripe.
AND YOUR ALL DONE!!
For more detailed instructions on installation after you have created the mirrors, go to: Instructions
These are instructions on how to install the professional aftermarket mirrors. My guide was designed to show how to make the mirrors yourself and save hundreds!
I will be glad to answer any questions, but assume NO RESPONISBILITY for damage to your car or the accuracy of these instructions. I doing this yourself you have a great potential to damage or break the glass on your mirrors. DO AT OWN RISK. If in doubt, go to a junkyard; pick up an extra set of mirrors to try this on.
Excerpts and some photos taken from Taurus Club of America